Installation of the Free-Flow-V TM Air Intake
© 9November2004 StealthV
Last Revision: 30November2004
Link to original insructions: http://www.stealthv.com/ffv_installation.htm
Caution - the CTS-V engine compartment can be very hot!
Allow the engine to cool to ambient temperature before performing the installation.
Installation time: Approximately 5 to 15 minutes for one person.
Items/tools needed:
5/16" socket (1/4" drive)
1/4" drive extension (optional)
1/4" drive ratchet or screwdriver handle
10-mm socket (3/8" drive)
7/16" deep-well socket (3/8" drive)
3/8" drive extension (~6" long)
3/8" drive ratchet
1. Verify the items in the kit before beginning the installation.
-(4) T-bolt Clamps
-(1) Aluminum Tube
-(1) Elbow
-(1) Coupler
-(1) K&N Filter
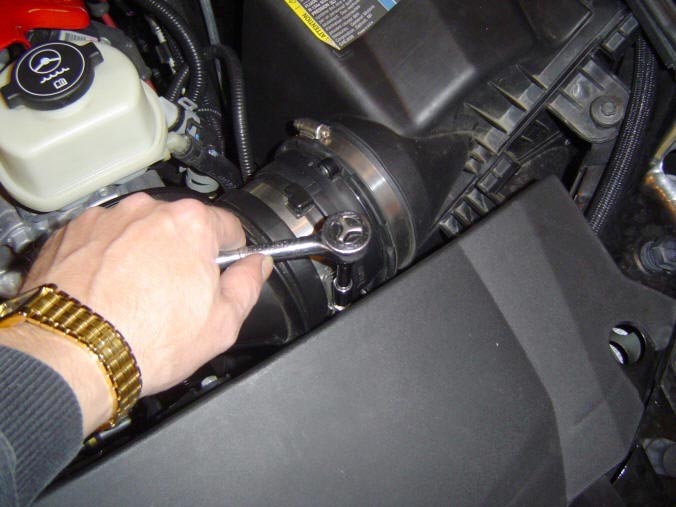
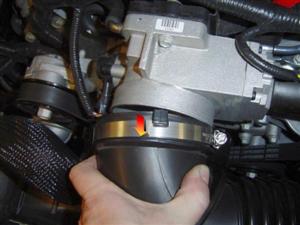
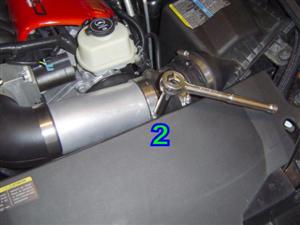
2. Use a 5/16" socket to loosen the hose clamp at the throttle body.
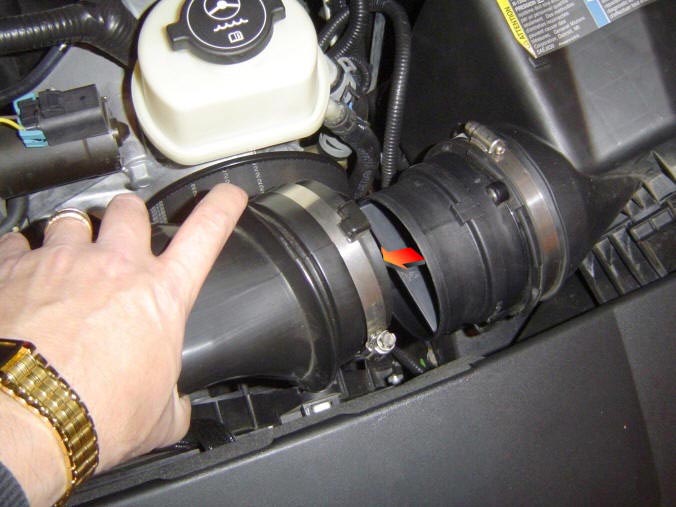
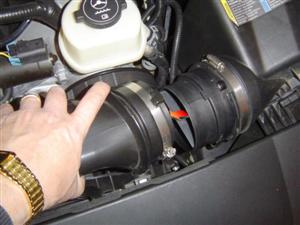
3. Follow the factory air tube across the front of the car and loosen the first hose clamp at the mass air flow sensor.
4. With the two clamps loose from steps 2 & 3, gently pull the factory air tube elbow away from the throttle body.
5. Finish removing the factory air tube by pulling it away from the mass air flow sensor.
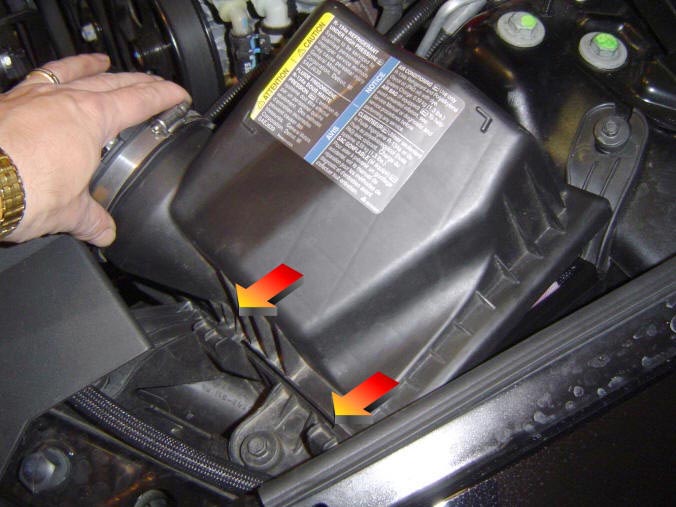
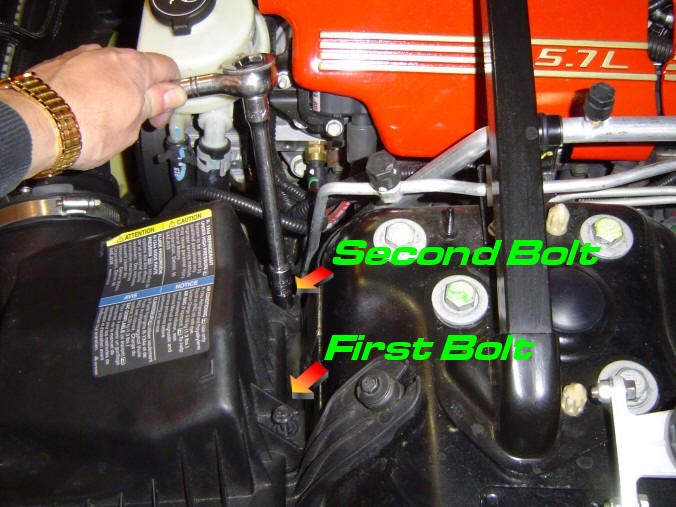
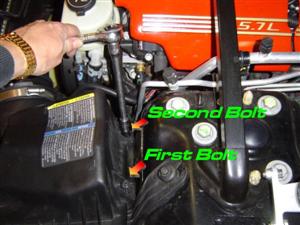
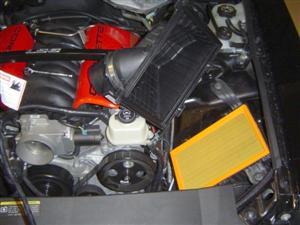
6. Use the 10-mm socket, extension and 3/8 ratchet to loosen the first bolt holding the air box closed.

7. Loosen the second air box bolt.
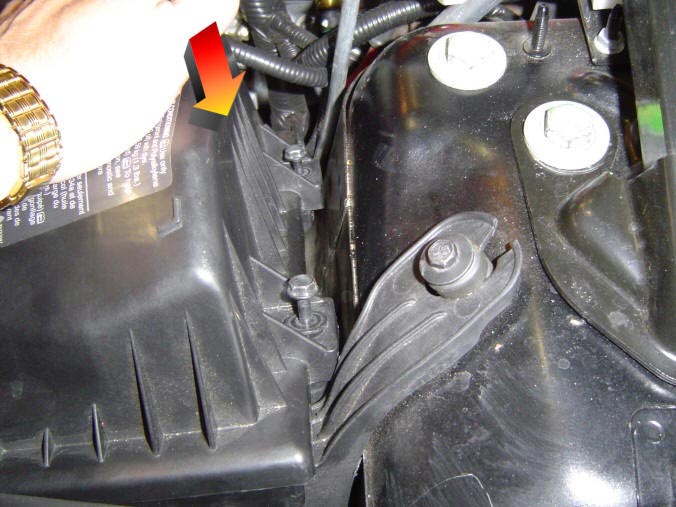
8. When both bolts are loose, the air box can be partially lifted open.
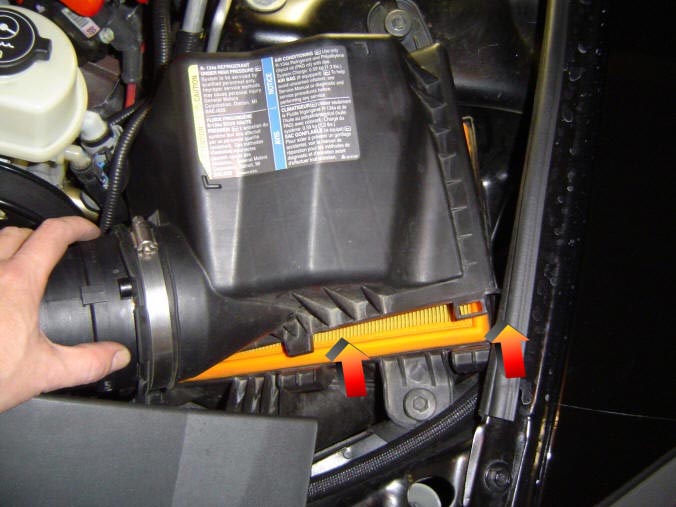
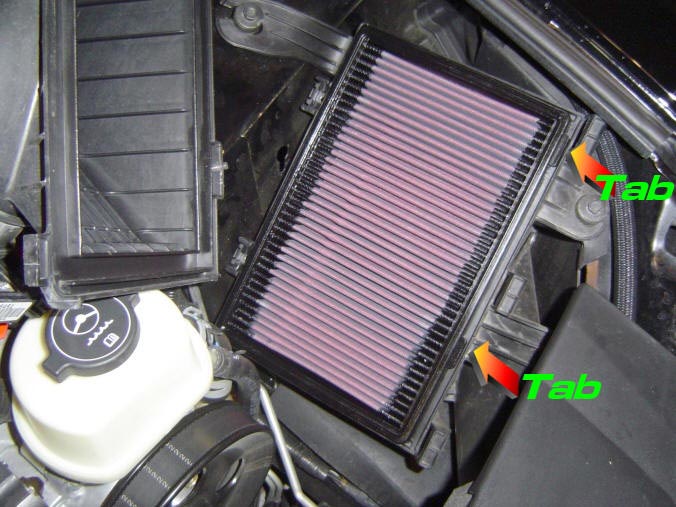
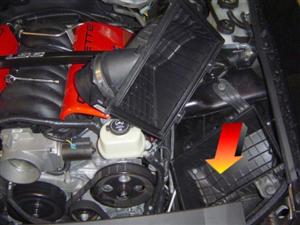
9. With the air box opened slightly as in step 8, slide the air box towards the rear of the car to disengage the tabs shown near the arrows.

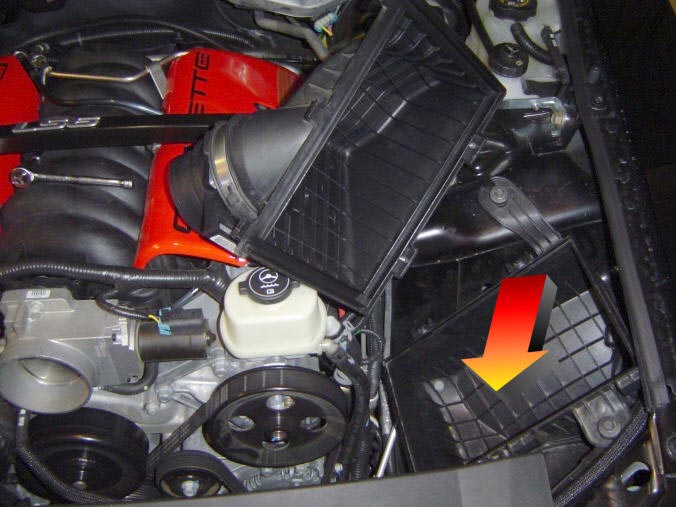
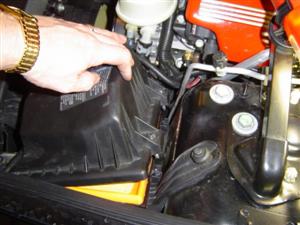
10. Swing the air box up and away and rest it on the engine.
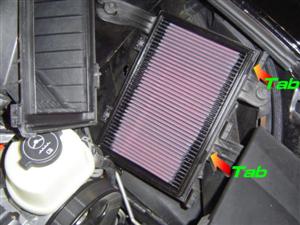
11. Remove the factory air filter and clean any debris such as sand or dead insects from the air box.
12. Place the K&N filter into the air box. ***Important*** Note the location of the two tabs.
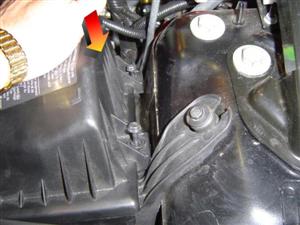
13. Re-engage the air box tabs.

14. Press down on the air box and by hand, begin to engage the threads of the two retaining bolts. One may need to wiggle the air box cover around a bit to line up and properly seat the cover, lining up the two bolts.
15. Tighten the two bolts with the 10-mm socket.

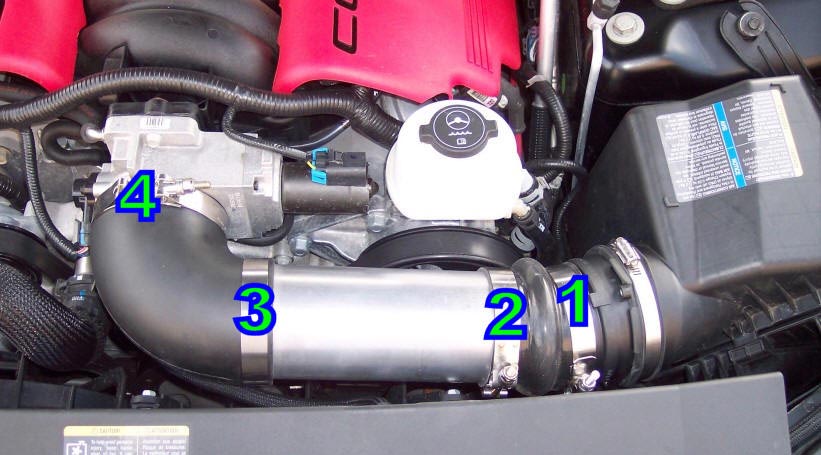
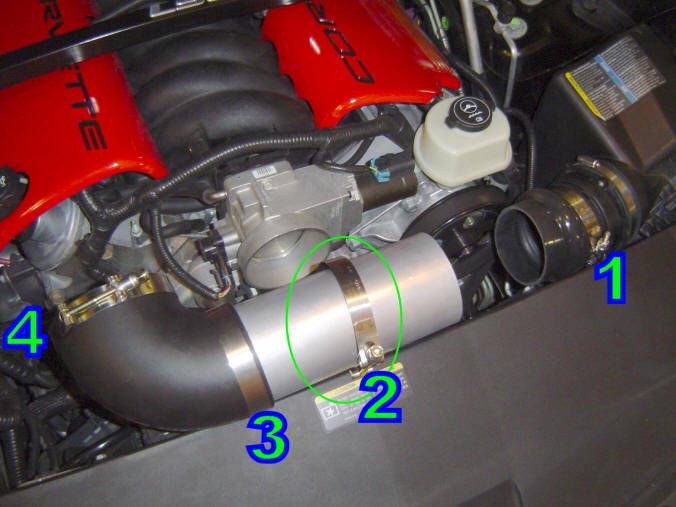
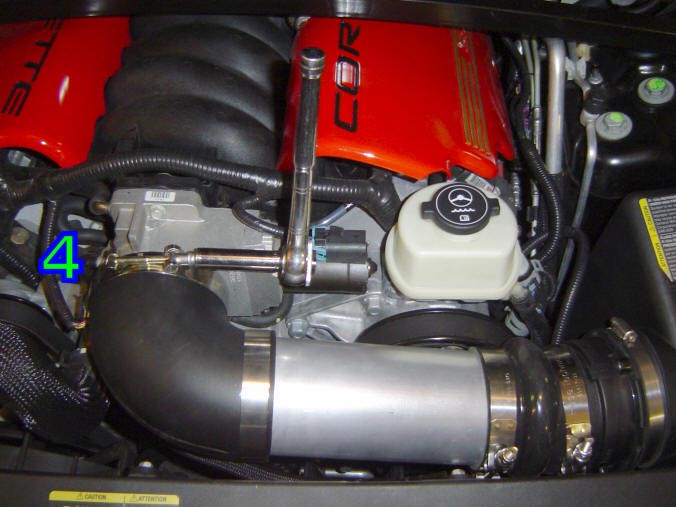
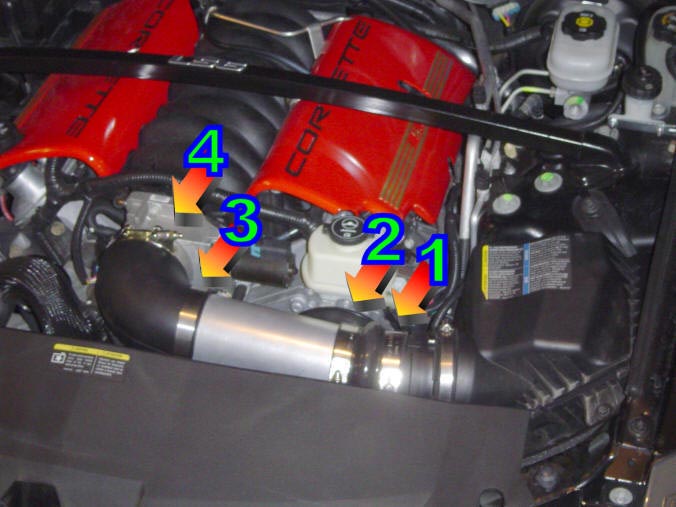
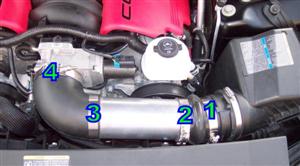
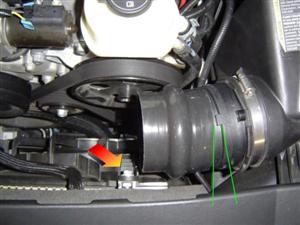
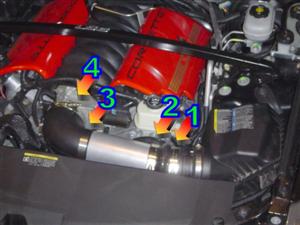
16. Using the following picture as a reference during the remaining steps of the installation. This picture shows the location of the four clamps which have been labeled as 1, 2, 3 and 4 in the kit.
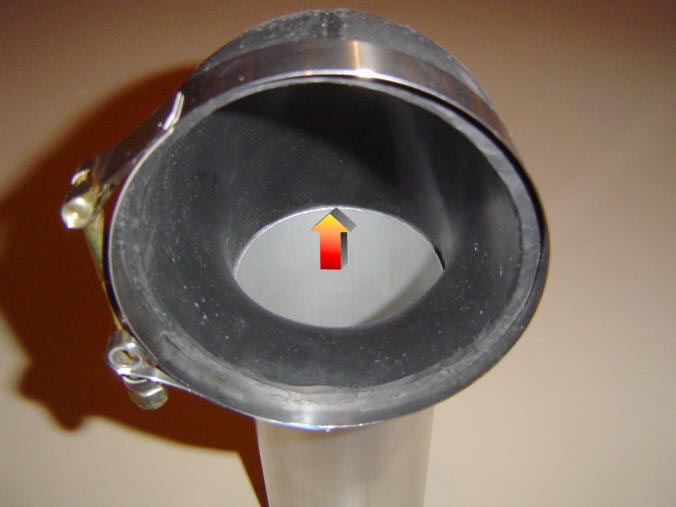
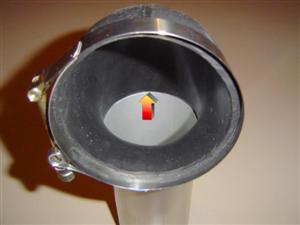
17. Place the aluminum tube inside the smaller diameter end of the 90 degree elbow. Make sure the aluminum tube is fully seated by looking inside the elbow at the area referenced with the arrow.
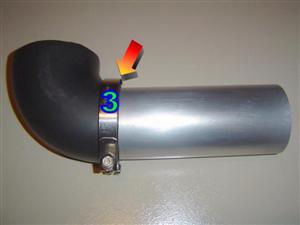
18. Place clamp #3 inline with the edge of the elbow as shown by the arrow and tighten with a 7/16" deep socket.
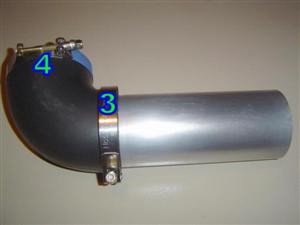
19. Loosen the nut of clamp #4 and slide it over the elbow. Leave clamp #4 loose at this time.
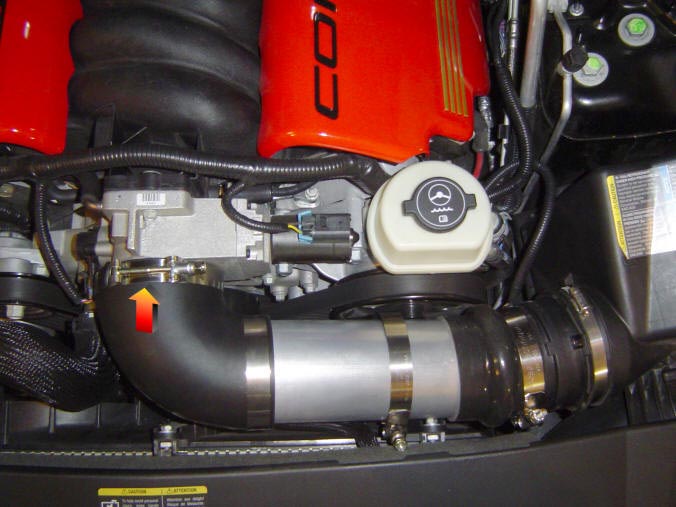
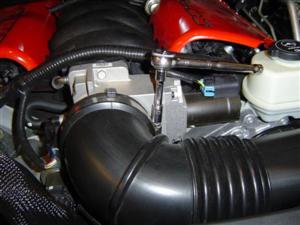
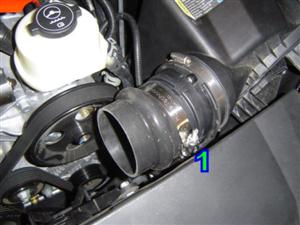
20. Place the silicone coupler over the end of the mass air flow sensor. Start the coupler on by placing the bottom on first and then stretch the top of the coupler over the MAF for a nice snug fit.
21. Slightly angle the silicone coupler to clear the radiator bolt pointed out by the arrow below.
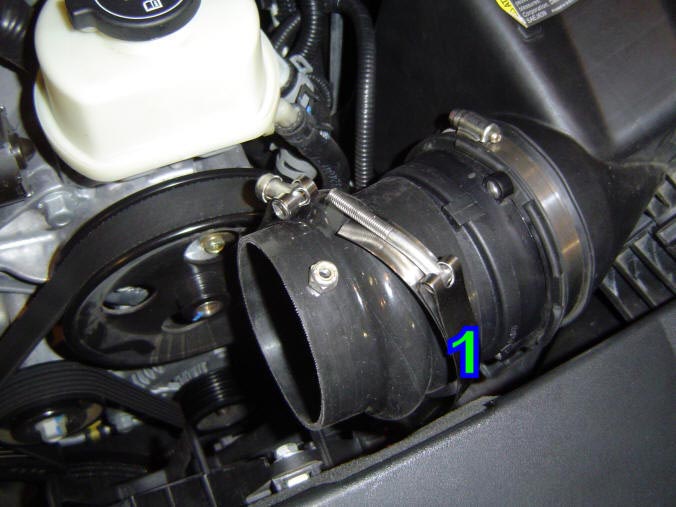
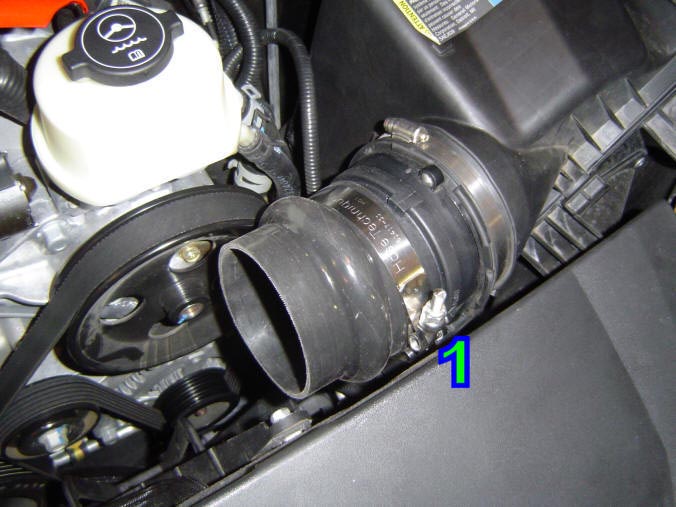
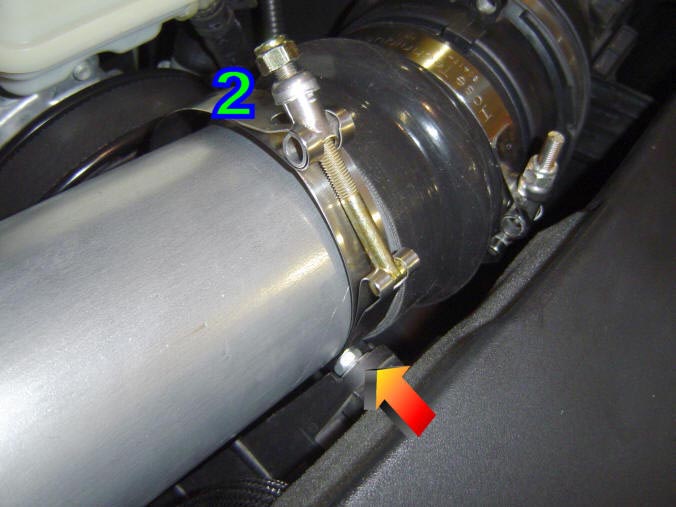
22. With a 7/16" deep socket, remove the nut on clamp #1 and slide the clamp over the hump of the silicone coupler.

23. Thread the nut back on clamp #1 and rotate the clamp into the position shown and tighten with a 7/16" deep socket..
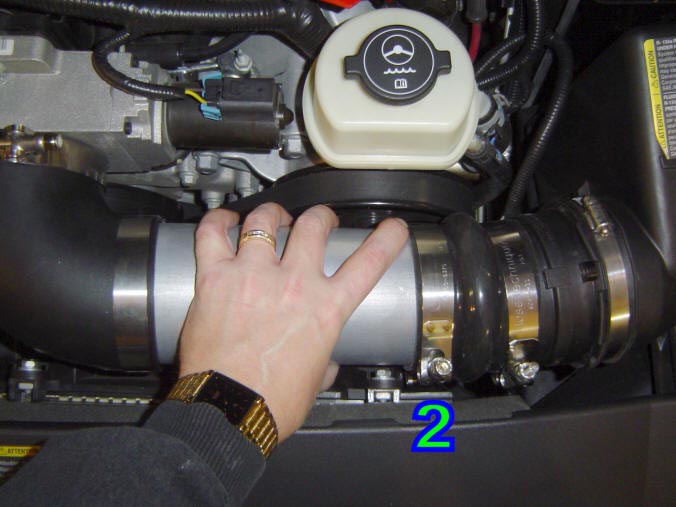
24. Place clamp #2, orientated as shown, over the end of the aluminum tube.

25. Slide the aluminum tube into the silicone connector.

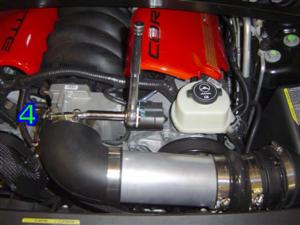
26. Slide the FFV's elbow onto the throttle body.

27. Slide clamp #2 past the radiator bolt.
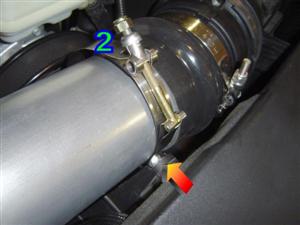
28. Orientate clamp #2 as shown.
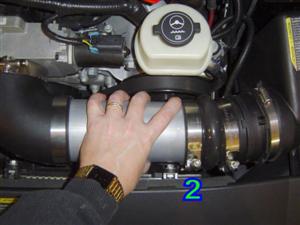
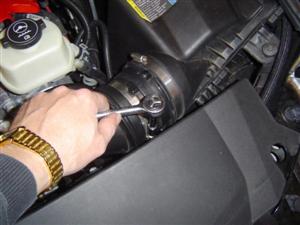
29. Make sure the FFV assembly clears the serpentine drive belt and tighten clamp #2 with a 7/16" deep socket.
30. Tighten the throttle body clamp #4 with a 7/16" deep socket.
31. Double check to ensure all four clamps are snug.
32. Enjoy your Free-Flow-V TM Air Intake!
33. To return to stock for that service visit in about 5 minutes, simply loosen clamps #1 and #4 which allows you to remove the FFV intake tube assembly in one piece. Swap filters and reinstall the factory tube. Easy as pie!
34. Tip of the day: Apply your favorite tire dressing to the elbow and coupler and an aluminum polish to the tube for a little extra shine under the hood.
|