How do I install the B&B Performance Exhaust with X-pipe?
3" Race X-Pipe Cat-Back Installation for the CTS-V
© 28August2004 StealthV
For video of this exhaust, please see the VIDEO LIBRARY
Use this as a pictorial reference only; always refer to the official B&B instructions for more detail or clarification.
For more information, please visit B&B Performance Exhaust
Installation time: Approximately two leisurely hours with one person.
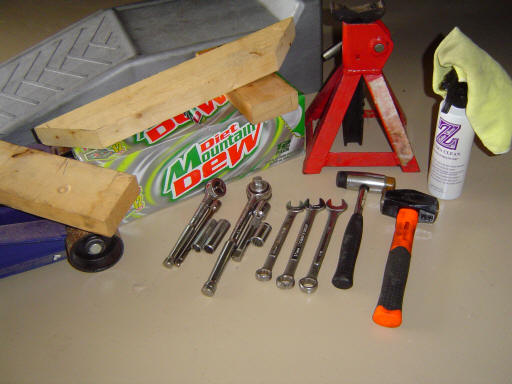
1. Items/tools needed:
-1 set of Rhino ramps
-1 set of jack stands (or second set of Rhino ramps)
-Hydraulic floor jack
-Trouble light
-1-pound hammer
-Rubber mallet
-11/16” wrench
-17 mm wrench
-16 mm wrench
-˝” drive ratchet
-˝” extension
-˝” drive, 16 mm socket
-3/8” ratchet
-3/8” extension
-3/8" drive, 13 mm socket
-3/8" drive, 15 mm socket
-3/8" drive, 16 mm socket
-Pry bar
-Drift punch
-12 pack of Dew ;-)
-scrap wood 2x4s
-Zaino Z6 (or equivalent for clean up prior to engine start)
-Microfiber towel
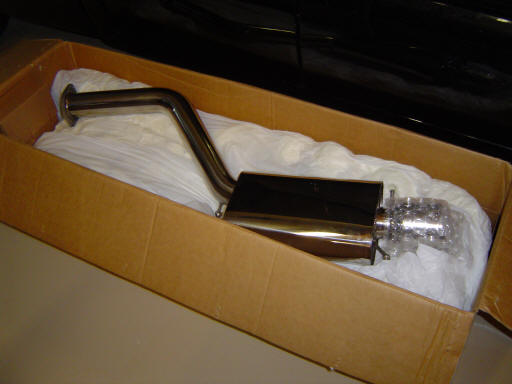
2. Open up the B&B box and admire the beauty of polished stainless!
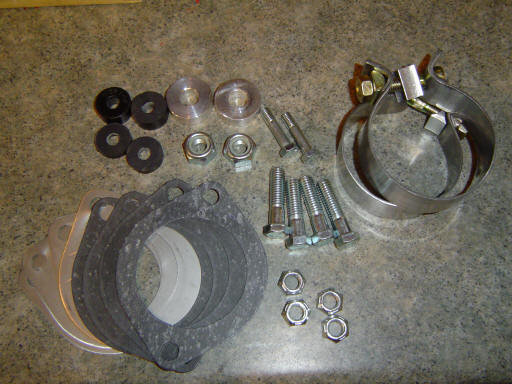
3. Compare your hardware included with the kit to the bill of materials on the B&B installation drawing.
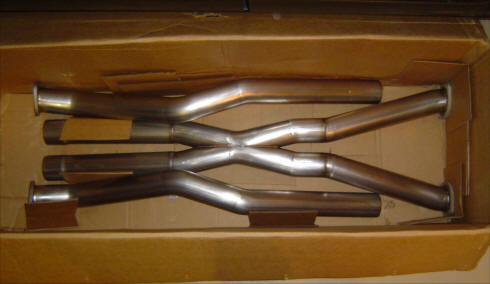
4. Oooo….x-pipe!
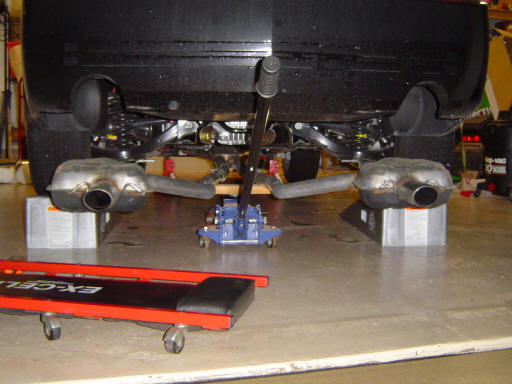
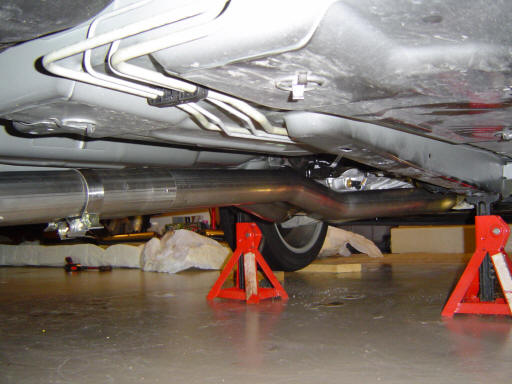
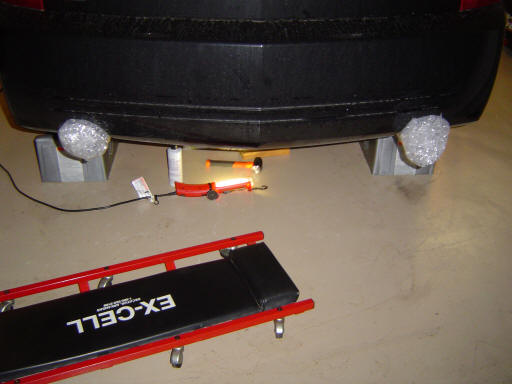
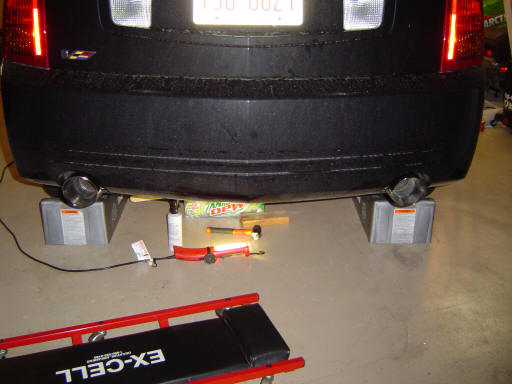
5. Support the rear of the V on Rhino ramps. Jack up the front and support the front of the V with jack stands (or another set of Rhino ramps).

6. Loosen the four nuts most of the way at the two front flanges of the factory exhaust, do not remove the nuts yet.
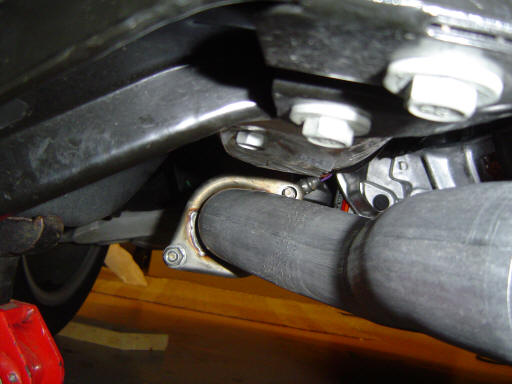
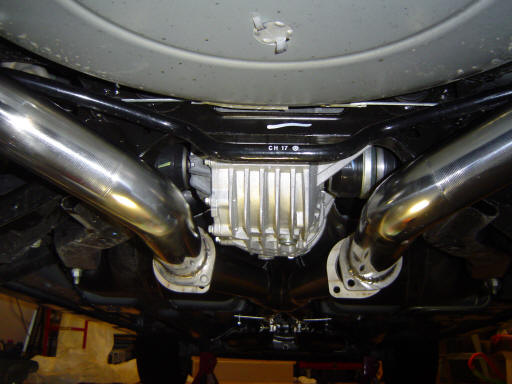
7. Remove the two bolts holding the center cross brace. Remove the center cross brace.
8. Place a 2x4 on the head of the floor jack, roll the jack under the rear of the car. Line up the 2x4 under the exhaust just in front of the differential. Raise the 2x4 up until it just contacts the exhaust.

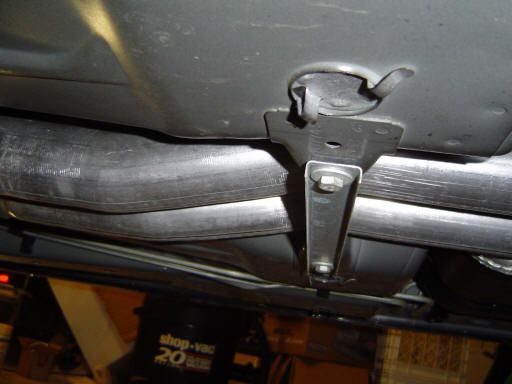
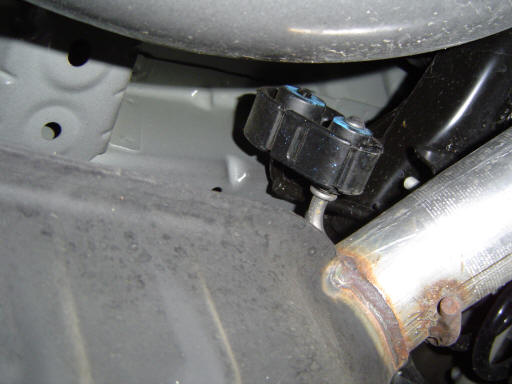
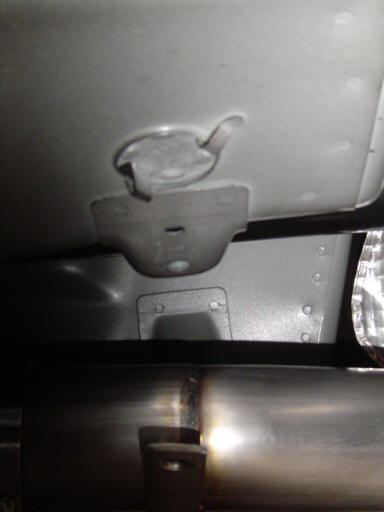
9. Slide the rubber muffler hangers off. The hanger shown is towards the front of the muffler.
10. The two hangers at the rear of the muffler are already removed in this photo.
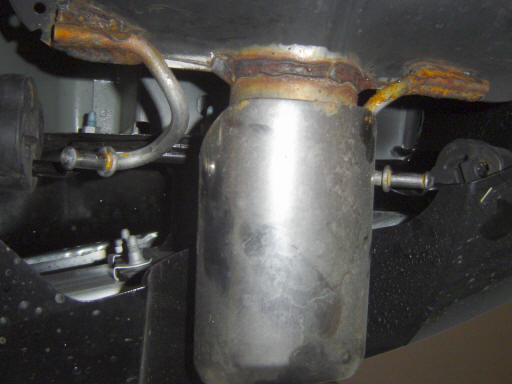
11. With the 3 rubber hangers removed on each muffler, slowly lower the floor jack. After the jack has been lowered all the way, finish removing the four front exhaust flange nuts.
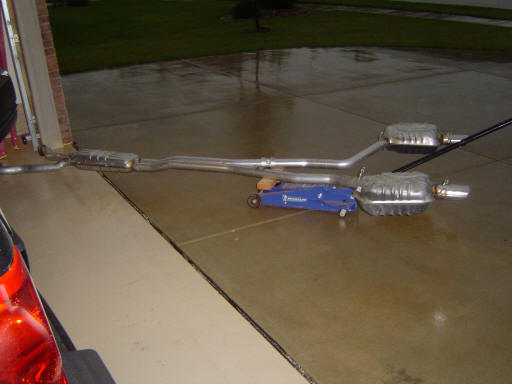
12. If you’ve placed the 2x4 in the position shown, the factory exhaust will be perfectly balanced and can easily be rolled out from under the car with the floor jack.
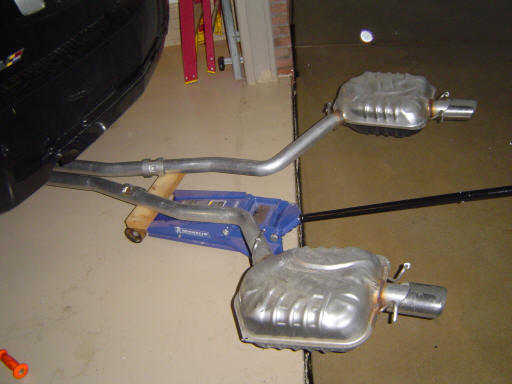
13. Oooo….balanced.
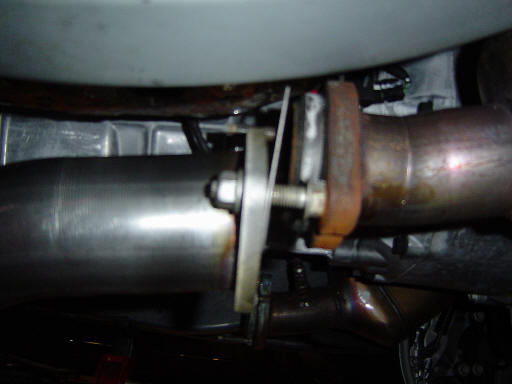
14. Attach the two front B&B pipes to the factory exhaust manifold down pipes, using the metal gaskets in between. Only start the nuts onto the studs at this time, do not tighten.

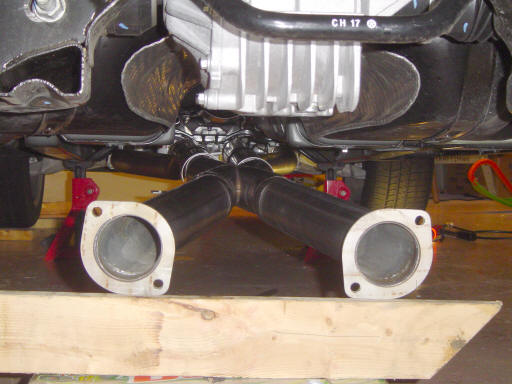
15. Slide the two clamps over the x-pipe. Make certain to orientate them such that the nuts are pointed down when installed on the car. Then slide the x-pipe under the car. Note the orientation of the center sheet metal tabs that are welded to the x-pipe.
16. Slide the x-pipe over the front pipes. Make sure to fully seat the x-pipe over the front pipes.
17. Support the rear of the x-pipe – I used a 12-pack of Dew and a 2x4 on edge. =) Use a 2x4 and a hammer to seat the x-pipe over the front pipes.
18. Line up the center support on the x-pipe with the two holes in the underside of the V’s body.
19. Install the B&B supplied bushings (two thick & two thin) and bolts into the center support.
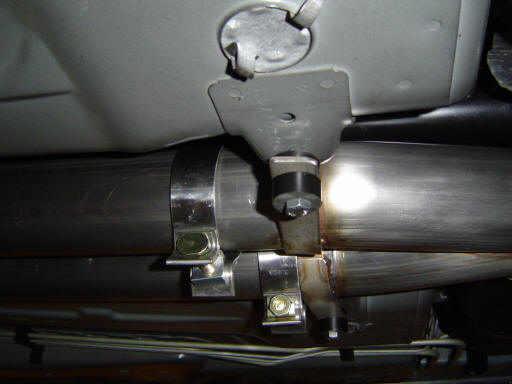
20. The thinner of the two bushings is on top.
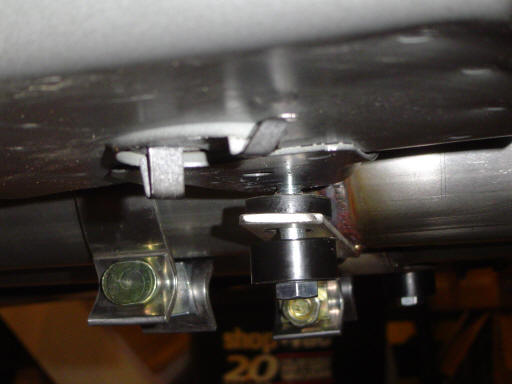
21. Place the mufflers under the car. With the six rubber muffler hangers off the car, lubricate the holes (I used a squirt of Zaino Z6). Install the three rubber muffler hangers on each muffler. Next, lift the muffler up into position and slide the front muffler hanger over the hook on the car. Then slide the two rear hangers onto the car’s hooks. Repeat for the second muffler.
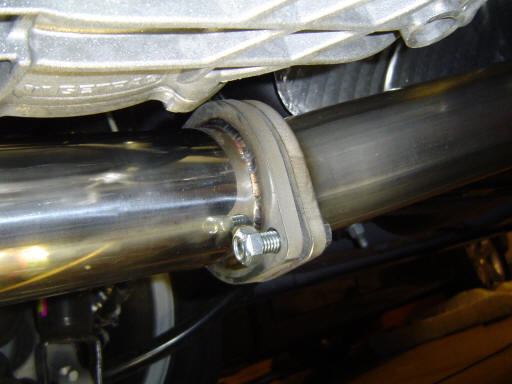
22. Line up the muffler pipes with the x-pipe. Place paper gaskets between the flanges and install the two nuts and bolts in each. Snug each side of the flange up evenly and tighten.
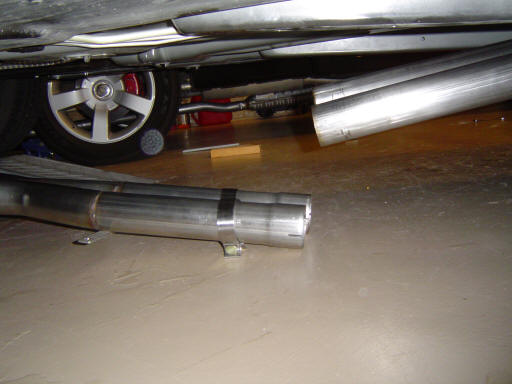
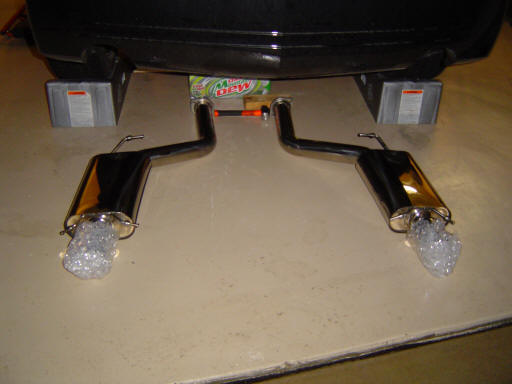
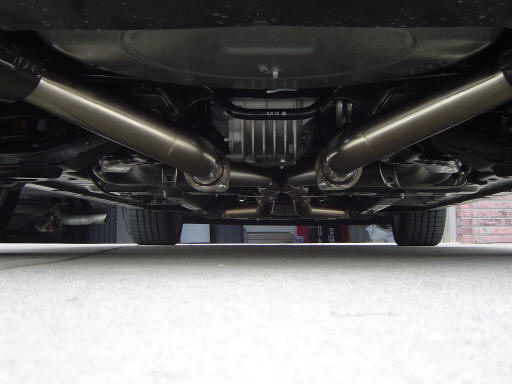
23. Prepare for the unveiling…
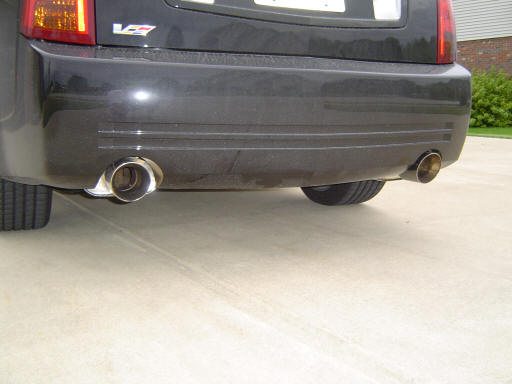
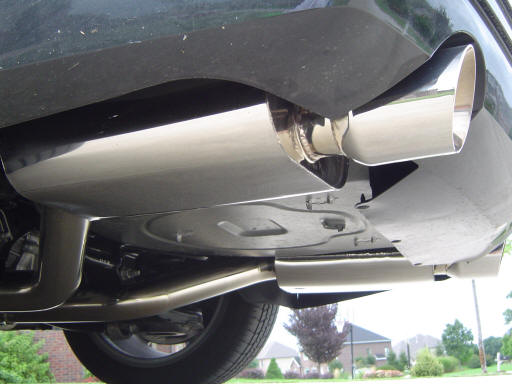
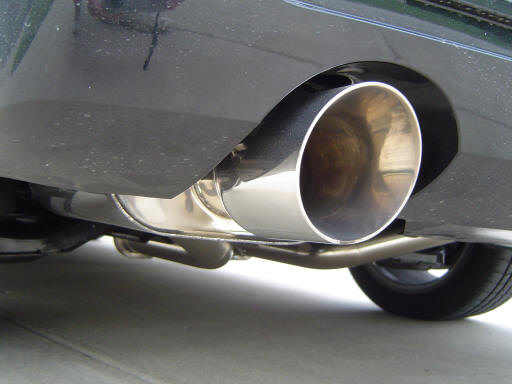
24. Look at those 4.5” tips…WOW!
25. Make sure to tighten the four bolts at the muffler/x-pipe joint first. Next, tighten the front four exhaust flange bolts at the front of the car. Next snug up the center support bolts and finish by tightening the clamps at the connection of the x-pipe and front pipes.
26. Before starting the engine, wipe down all surfaces of the exhaust – mufflers, tips, pipes to prevent blemishes and fingerprints from being burned in, discoloring the surface of the stainless. For mine, I used a microfiber towel and Zaino Z6.
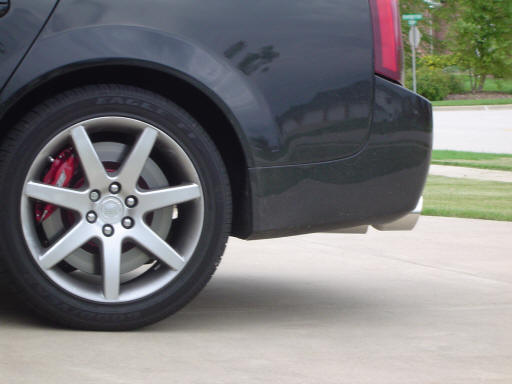
Photos after 6 good heat cycles and 100 miles later....
|

