
|
This information is provided as guidance Only. Use this information at your own risk! This site is not affiliated with General Motors or Cadillac. All trademarks are property of their respective owners. |
 |
|
This information is provided as guidance Only. Use this information at your own risk! This site is not affiliated with General Motors or Cadillac. All trademarks are property of their respective owners. |
|
Base audio to NavExplanation: Installation of a Factory Navigation Radio into a non-Navigation equipped CTS.Disclaimer: Mod at your own risk - any omissions or errors on my part are not my responsibility. Preliminary: This install (Phase 1) gives you a working Navigation system without the voice recognition or voice commands, and without the navigation voice guidance. For Non-BOSE systems, you will still not have Digital Signal Processing (DSP) or Auto Volume Control (AVC) even though the radio gives you those options. Also, for Non-BOSE systems, you will not have to worry about the audio system going mute when the Navigation system wants to give a guidance command - however, if you have the BOSE system and have guidance on, your audio will go mute each time the amp tries to switch to the navigation audio outputs to give guidance through the audio system (this is fixed in phase 3). Parts Needed:
Installation: Removal of the old radio: Take a small, thin flat-blade screw driver and slowly slide it behind the right side of the upper air vents above the radio (see Figure 1), and pry it toward you to release the clip on that side. Once the clip releases, continue to pull the entire unit toward you to release the clip on the left side. Pull the unit complete out, and flip it over and lay it on the dash (see Figure 2). 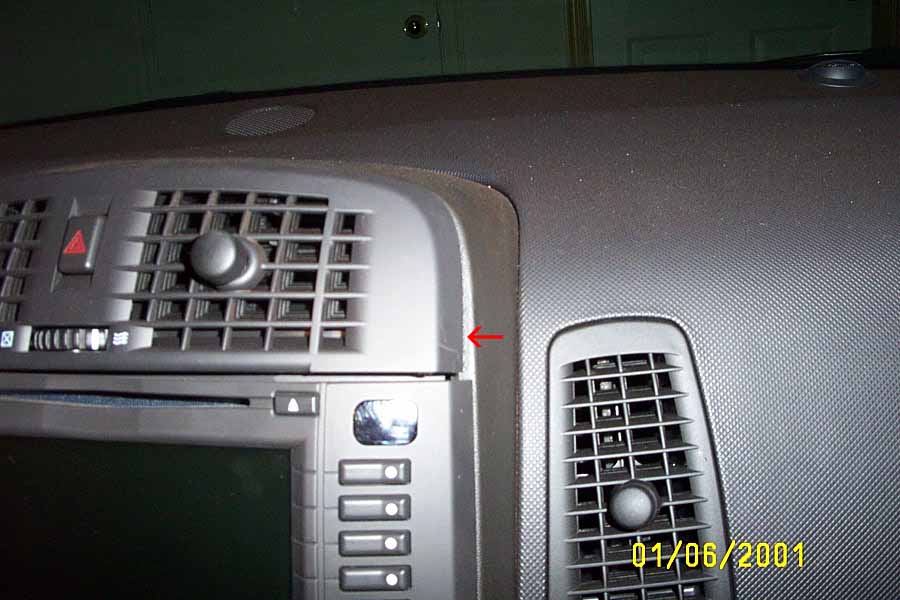
Next, open the ashtray, then remove the astray from the holder. Behind the ashtray door you will see a small hole in the upper right, and in this hole is a hex screw (see Figure 3). Remove this hex screw as this holds the ashtray-climate control system to the dash. 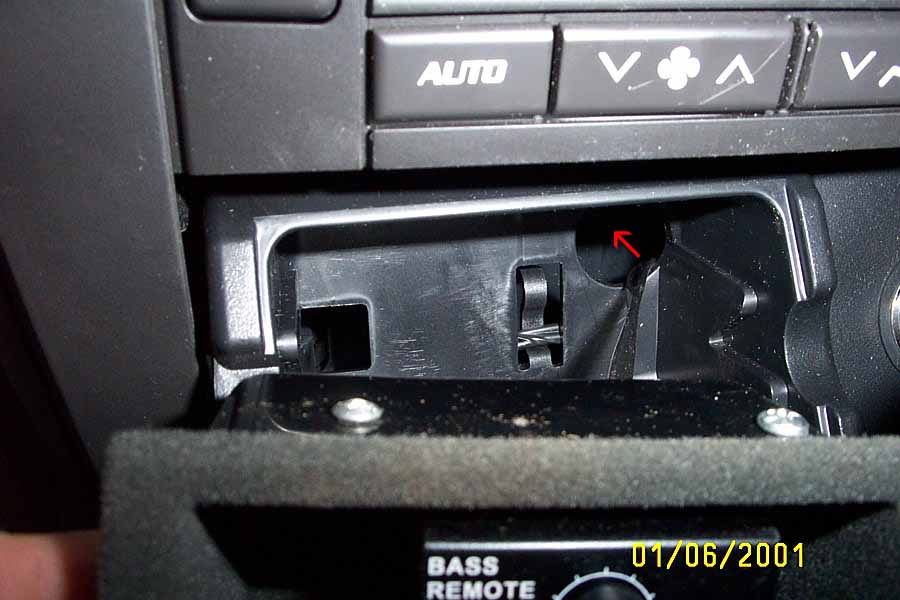
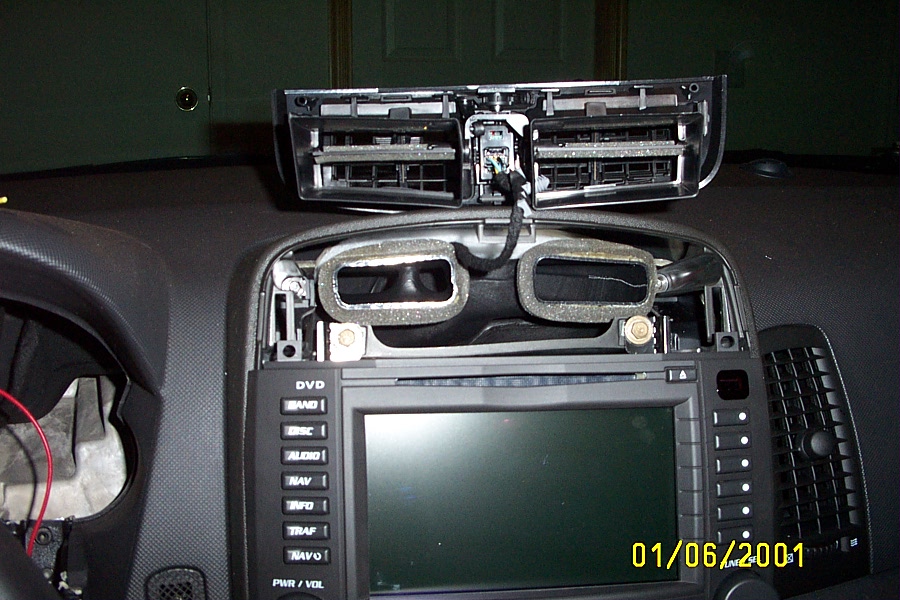
Next, just as you did above with the upper air vent system, slide a screw driver behind the upper right section of the climate control cover, and pry toward you until the clip are released. Then continue to pry along the edge to release all 4 clips (two on both sides). Now put the key in the ignition, put the parking brake on, turn the car on (do not start) and slide the transmission selector into 2nd gear (as far back as possible). Pull the climate control unit out, remove the main electrical plug, and push the unit over to the right side of the dash (see Figure 4) and out of your way. Put the car back in park. 
Now remove the 4 bolts securing the radio (10mm socket), and slide the radio out. Disconnect the radio connectors and the FM/AM antenna coax (see Figure 5). 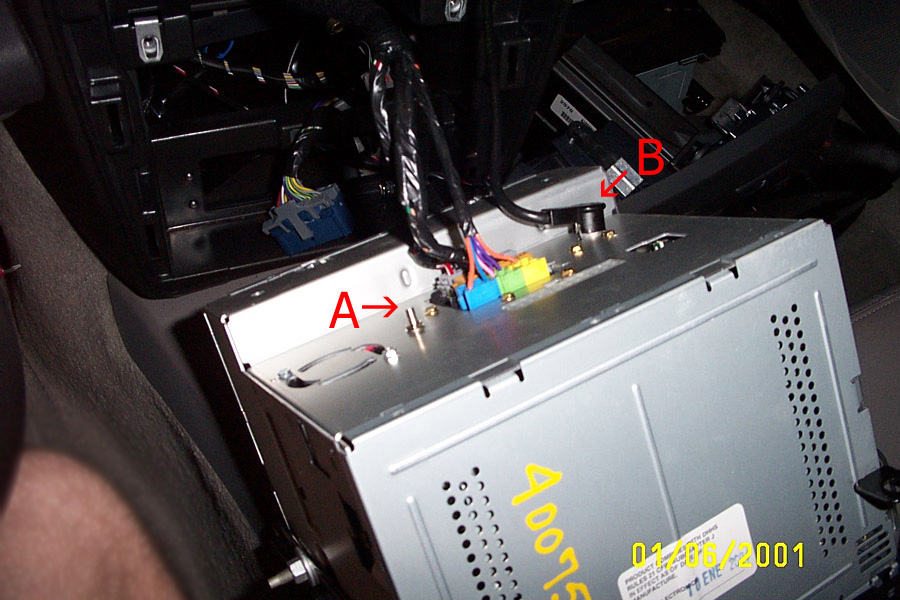
Installation of the Vehicle Speed Signal wire: You need to remove the instrument cluster for this. Simply pry the rear steering wheel filler panel up (between the back of the steering column and the bottom of the instrument cluster). Take note of how the wiring fits along the inside groove of the filler panel, and pop the wiring out, and set the filler panel aside. Now remove the two screws that retain the lower part of the instrument cluster. Pry down between the upper instrument cluster and upper dash, until the instrument cluster pops down away from the dash. Pull the instrument cluster toward you until you can gain access to the cluster electrical connector. This connector is a locking connector, so you have to pop the lever up and pull the lever to a 90 degree position and the connector will come out of it's socket. Now remove the cluster completely. Cut away some of the covering wrap around wires on the electrical connector. Pull the brown wire away from the rest of the wires. Using a wire tap, add another wire to the brown wire (Figure 6, "A"), and run this wire behind the right side of the dash and into the radio area (Figure 6, "B"). Re-tape the instrument cluster connector wires with electrical tape. 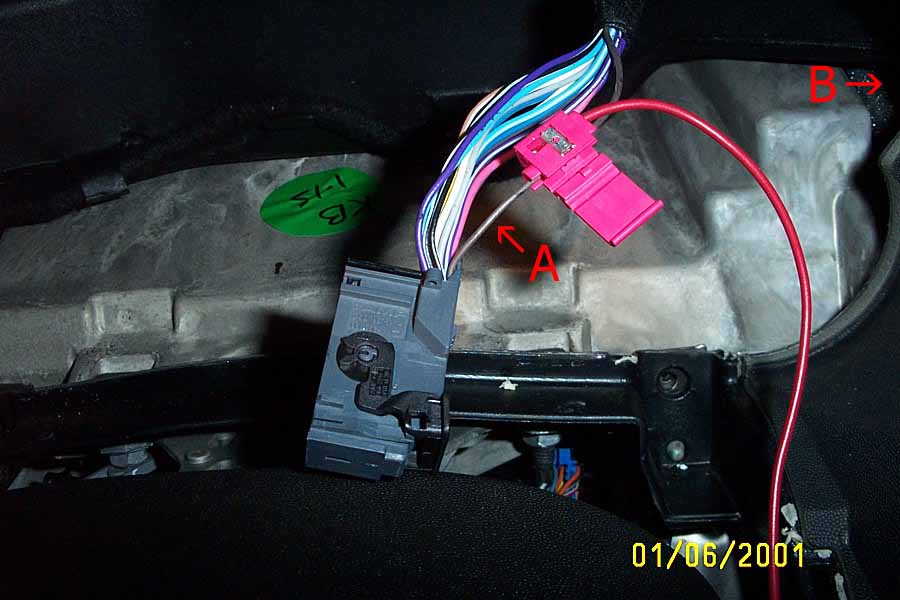
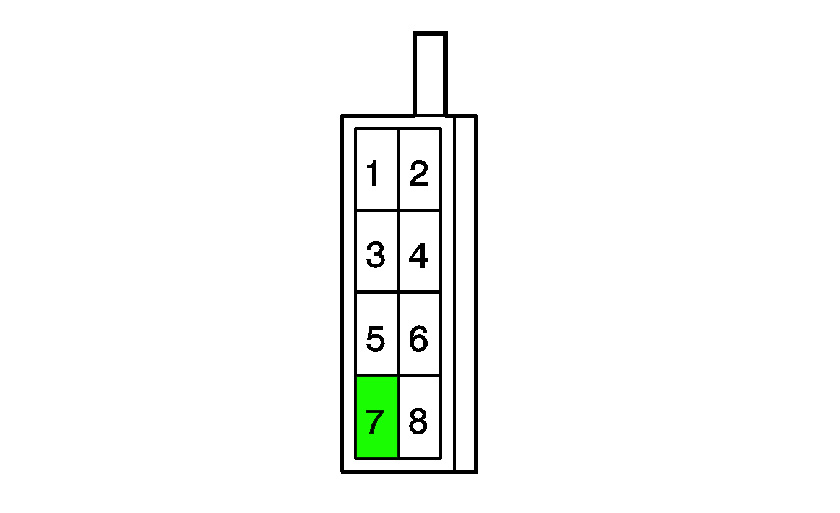
Put the instrument cluster back in, following the reverse, taking note to slide the wiring back into the filler panel when you put it back in. Now take out your Volkswagen radio harness (one of them). Pick a wire color you want to use (I chose yellow), and from the face of the connector, slide a very small, thin tool into the side of the terminal to "pop" the terminal from the connector. Take this wire and terminal and slide it into Radio connector 2 (brown), pin 7 (see Figure 8) until it clicks (also see figure 7). Now attach this wire to the wire you fed from the instrument panel. 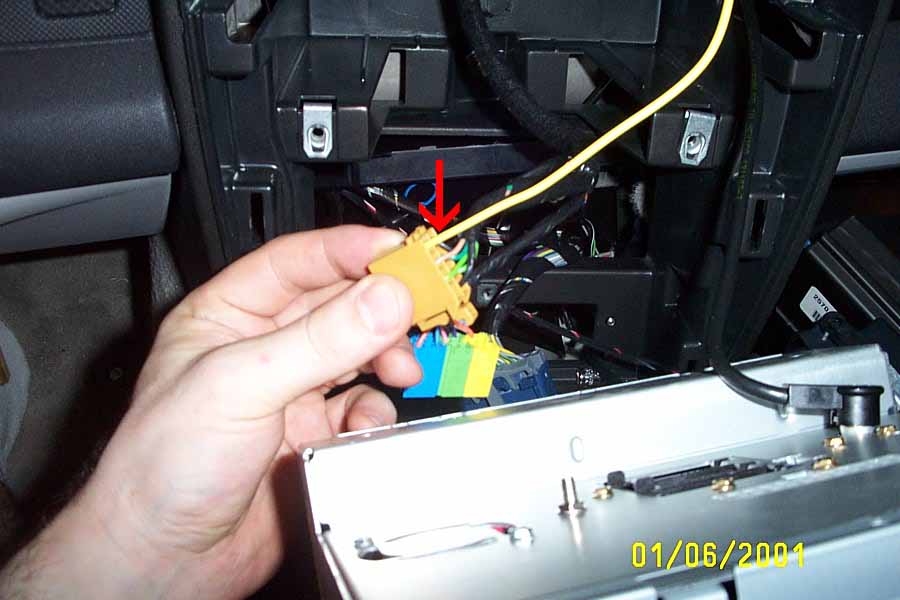
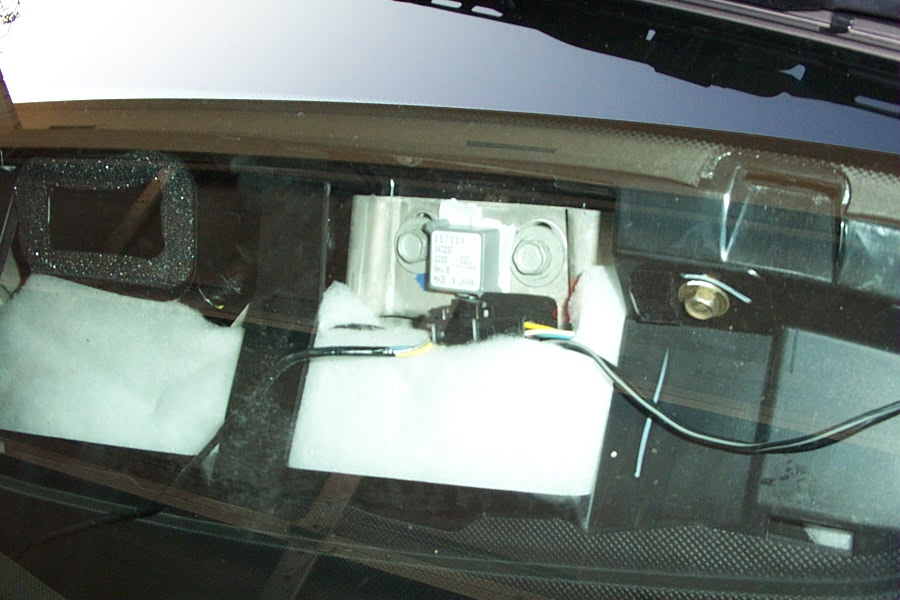
Installation of GPS Antenna: Pry the front dash cover (the front cover with the defroster vents and the light sensor) up at one corner until you release one of the 4 clips, and slowly work your way across the dash until you have pried the complete unit up. Pull it toward you slightly, then let it sit on the dash (the light sensor wires will still be attached). Feed the coax end of the GPS antenna down behind the dash into the radio area. I did this just to the right of the center channel speaker (or speaker mount if you don't have the speaker). Then using the 3M tape, affix the GPS antenna to the metal dash structure on the right side of the dash by the windshield (see figure 9 and 10). 
Installing the Navigation radio: No plug the GPS antenna to the SMB connector on the back of the Navigation radio (see Figure 5, "A"), attach the FM/AM coax (Figure 5, "B") and the rest of the radio connectors. Slide the Radio into the opening, making sure to reach behind it so that the FM/AM antenna cable does not get wedged between the bottom of the radio and the rear of the dash. Screw the 4 bolts back in to hold the radio, then put the transmission pack into 2nd, bring the climate control unit back up and plug the connector in, then align it and snap it back into place. There is no need to put the hex screw back in as the 4 clips hold the unit better than the hex screw ever did, and it makes it easier to gain access to the radio at a later date. Then bring the upper air vent unit back down and snap it back in. 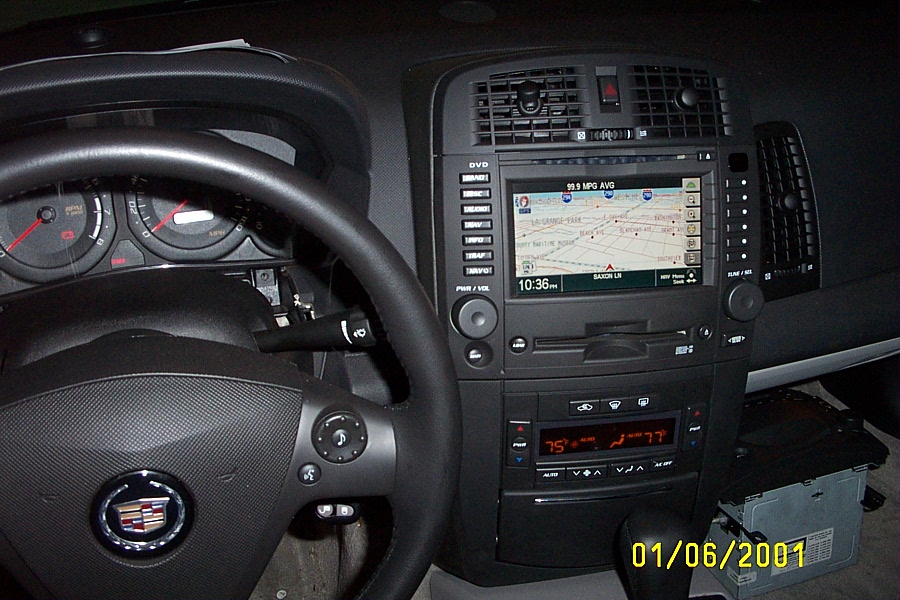
Now power the car up. You most likely will get the following error: The system will start up, and about 2-3 seconds later will stop and the screen will say "Theftlock Activated" or something to that tune. You need to take your vehicle to a local Cadillac dealer, have them plug the Tech2 unit into it, and clear this code. Install Time: Approx. 1 hourApprox. Cost: $900 - $1500 For part II (enabling voice commands, etc) go hereWritten by Miscreant | ||||||||||||||||