Ground Control Coil Over Conversion Install
Thanks to Ron Rath
USE THIS AS A GUIDE AND ALWAYS FOLLOW THE INSTRUCTIONS PROVIDED WITH THE KIT
USE PROPER SAFTEY PROCEDURES AS WELL
Rear
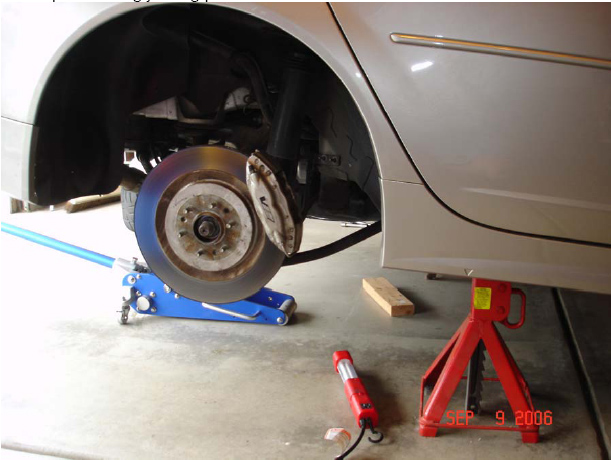
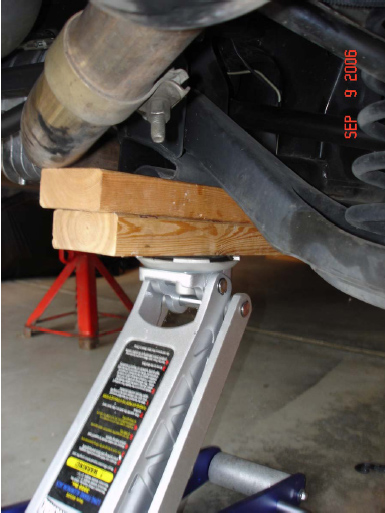
1. Raise and properly support back of car. I used a long metal bar that I had which reached across from one of the lower A-arms to the other and jacked up in the middle. I then put jack stands under the rear jacking points using jacking pucks.
 2. Remove wheels
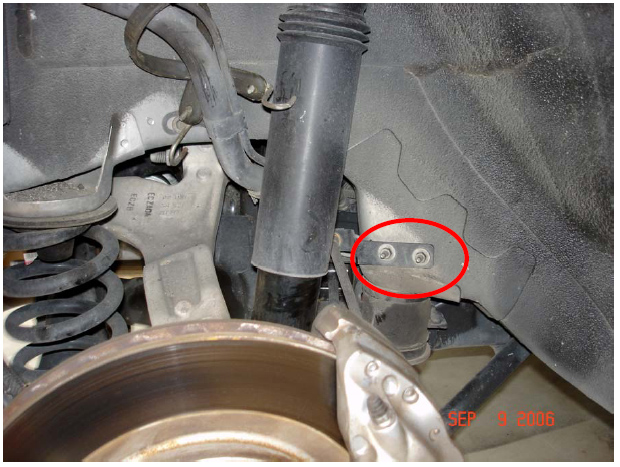
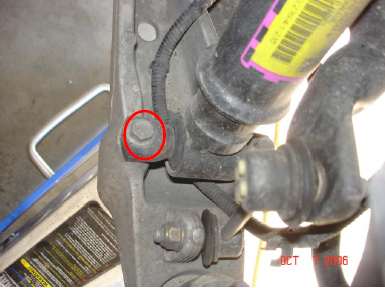
3. On the passenger’s side of the car you will need to remove the brake pipe bracket so that the suspension can be lowered. It is attached by 2 10mm nuts.
2. Remove wheels
3. On the passenger’s side of the car you will need to remove the brake pipe bracket so that the suspension can be lowered. It is attached by 2 10mm nuts.
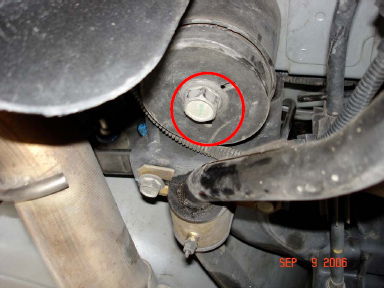
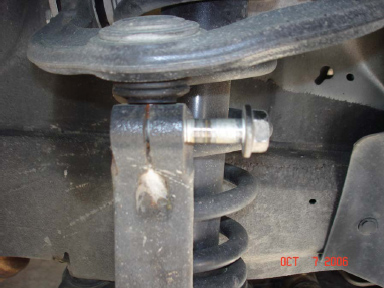
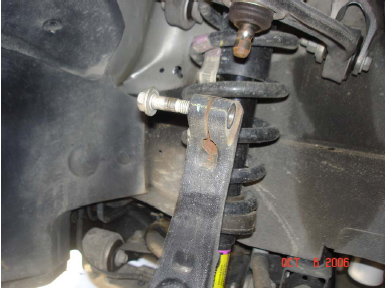
 4. Support the lower control arm using a jack and remove the lower shock mounting bolt (21mm). Lower the jack and put it under the cradle.
 5. Remove the 2 cradle to body mounting bolts and washers. The Front is 24mm and the rear is 21mm.
 6. Low the cradle enough to remove the coil spring
7. Remove the rear seat by pushing rearward and pulling up on the front of the seat bottom on both the drivers and passengers side of the car. The seat bottom can then be removed from the car. There are 4 nuts that need to be removed from the bottom of the seat back inside the car and 4 nuts that need to be removed from the top of the seat back in the trunk.
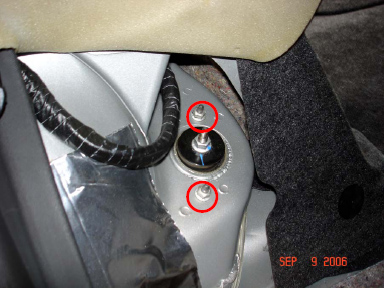
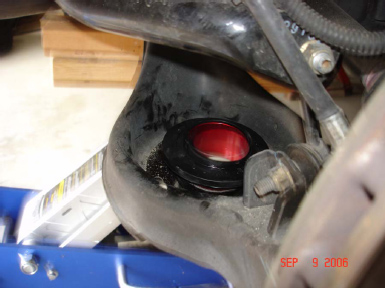
8. Lift the sound proofing to expose the top shock mount nuts and remove the 2 outer nuts which will allow you to remove the shock.
6. Low the cradle enough to remove the coil spring
7. Remove the rear seat by pushing rearward and pulling up on the front of the seat bottom on both the drivers and passengers side of the car. The seat bottom can then be removed from the car. There are 4 nuts that need to be removed from the bottom of the seat back inside the car and 4 nuts that need to be removed from the top of the seat back in the trunk.
8. Lift the sound proofing to expose the top shock mount nuts and remove the 2 outer nuts which will allow you to remove the shock.
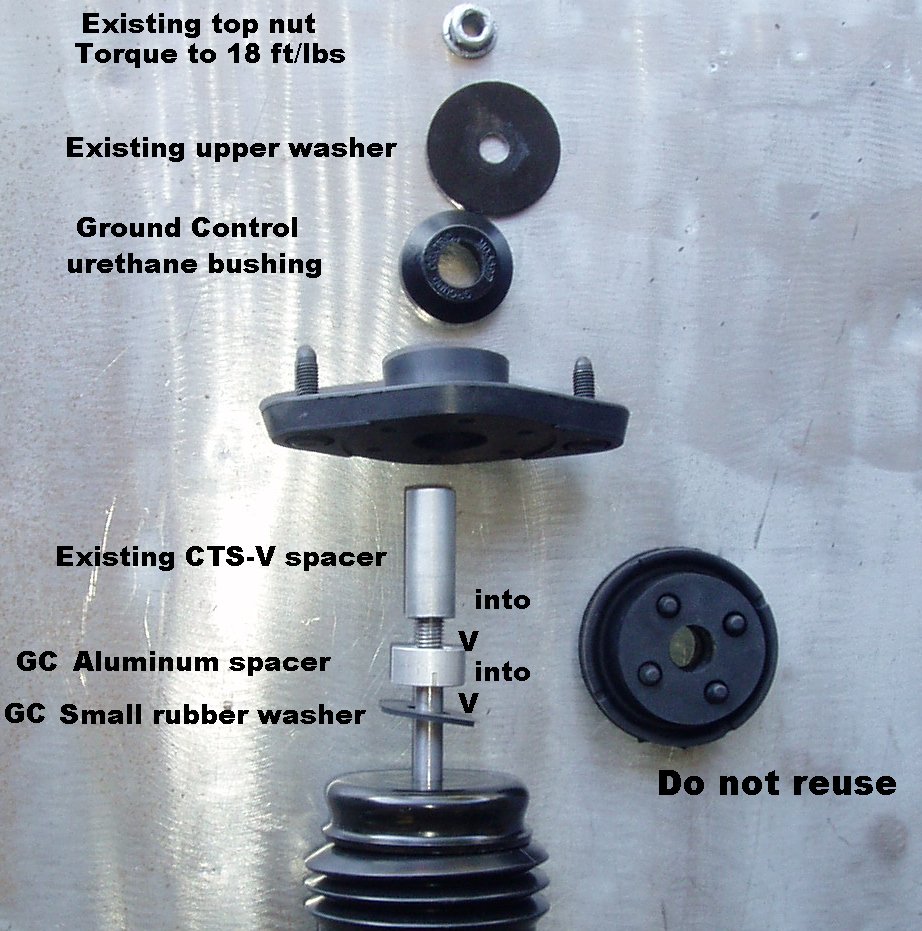
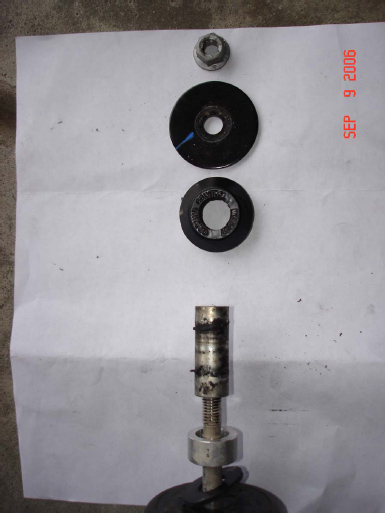
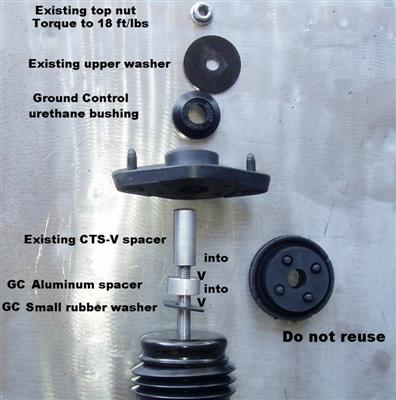
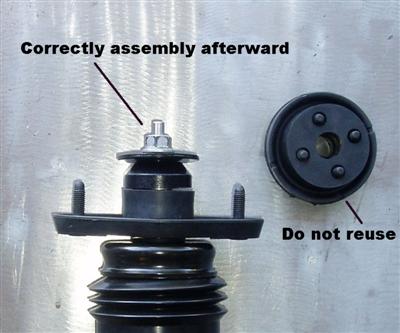
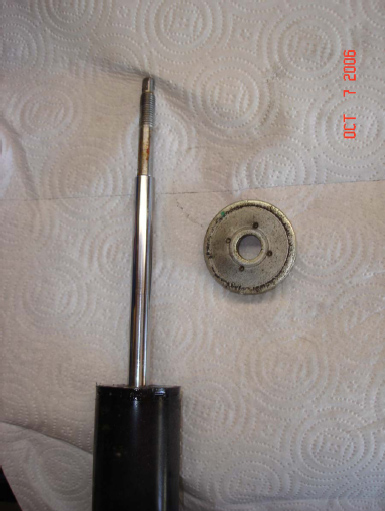
 9. After removing the shock from the car disassemble the top of the shock by removing the remaining nut.
10. Assemble the top of the shock per the GC sketch adding the new parts.
9. After removing the shock from the car disassemble the top of the shock by removing the remaining nut.
10. Assemble the top of the shock per the GC sketch adding the new parts.
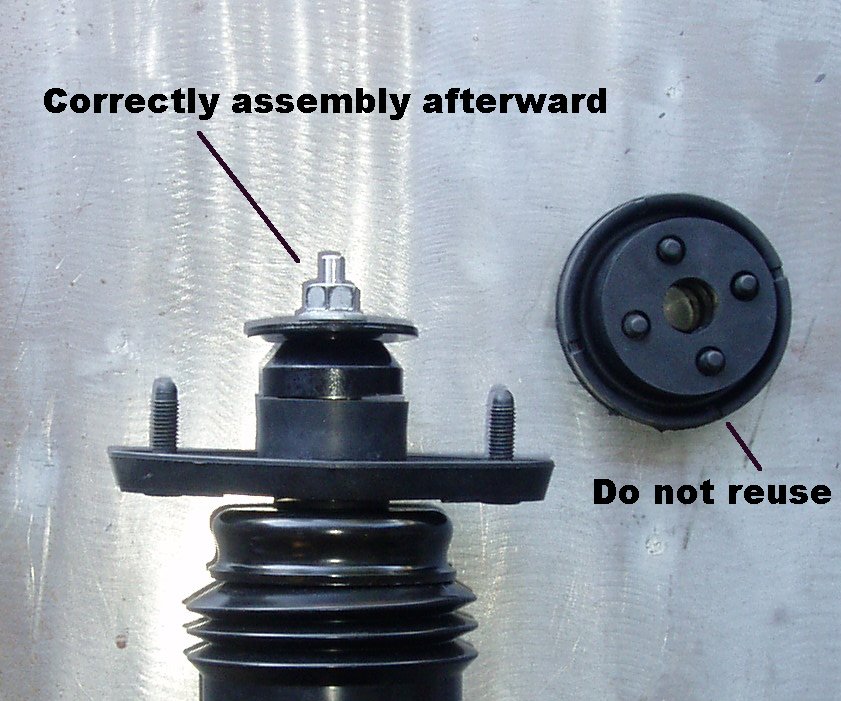
 11. Reinstall the top of the shock into the car.
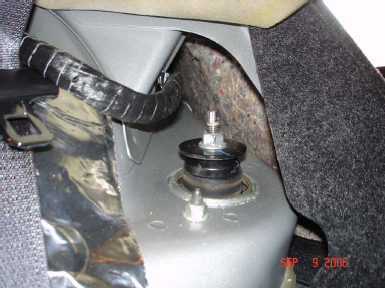 12. Install the rear upper mount per the GC sketch.
 13. Install lower mount per GC sketch.
 14. Insert the spring between the 2 mounts and raise the cradle with the jack.
 15. Re-attach the cradle to body mounting bolts and washers. Front 24mm bolt at 265 Nm (195 lb ft), Rear 21mm bolt at 191 Nm (141 lb ft)
16. Re-attach lower shock mounting bolt and tighter to 150 Nm (111 lb ft)
17. Install the brake pipe bracket (Passengers side only) tighten to 10 Nm (89 lb in)
18. Put the tire back on and repeat on the other side of the car.
15. Re-attach the cradle to body mounting bolts and washers. Front 24mm bolt at 265 Nm (195 lb ft), Rear 21mm bolt at 191 Nm (141 lb ft)
16. Re-attach lower shock mounting bolt and tighter to 150 Nm (111 lb ft)
17. Install the brake pipe bracket (Passengers side only) tighten to 10 Nm (89 lb in)
18. Put the tire back on and repeat on the other side of the car.
Random thoughts about the rear install:
1. It’s a good idea to actually remove the rear seat as a first step then you’re not trying to do it with dirty hands while the car is up in the air. Putting a 5 year old in the trunk (as I did) to remove the 10mm bolt works well if you forgot to pull them prior to putting the car up in the air ?
2. While you have the back end of the car in the air it’s a good time to perform a number of other misc tasks
a. Change diff lube
b. Re torque/adjust aftermarket exhaust
c. Re torque diff mounting/ pinion bolts
Front
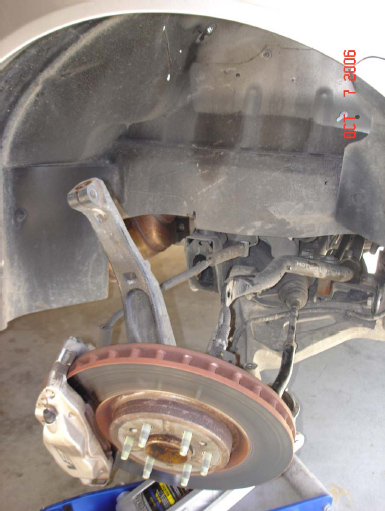
1. Jack up car and put on jack stand. Place jack to support lower A-arm. Jack up under lower control arm until you almost lift the car off the jack stand.
 2. Remove upper control arm to steering knuckle bolt and nut. There will still be some pressure on the bolt and you’ll need to either push down on the control arm or just screw the bolt all the way out. If you don’t support the lower arm with a jack the upper arm will spring up rather violently when you remove the bolt (don’t ask how I know this…)
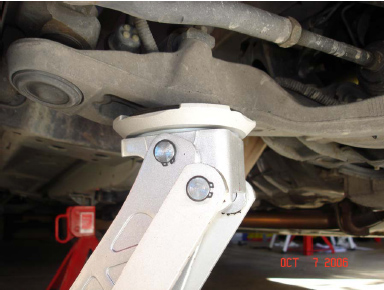
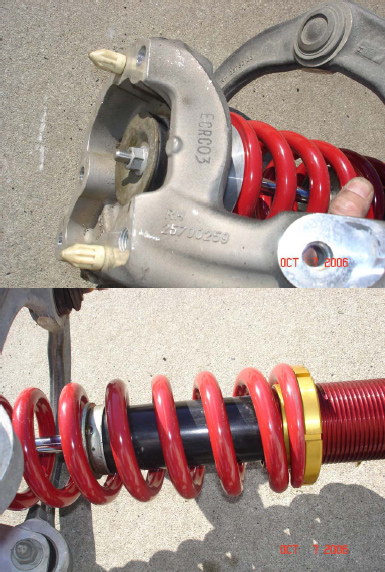
 3. Disconnect the upper ball joint from the steering knuckle.
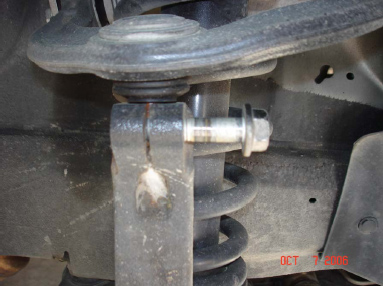
 4. Remove the 2 lower shock mounting bolts.
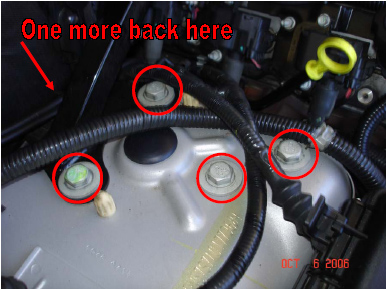
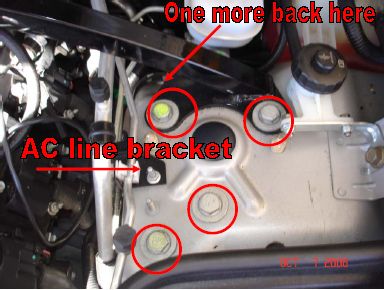
 5. Remove the 5 upper shock module mounting bolts, they are 18mm. These are located in the engine compartment. On the Passengers side you will need to remove the battery to properly access the bolt that faces the firewall and on the Drivers side you may want to remove the air conditioning line bracket (I did not but it depends on how much room you have for your wrench).
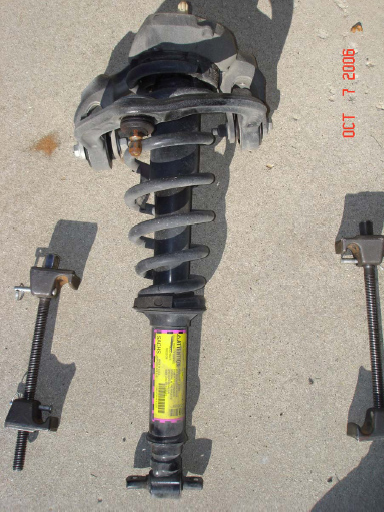
 6. Lower the jack and remove the shock module.
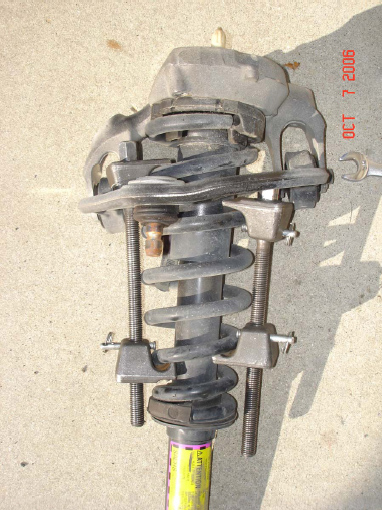
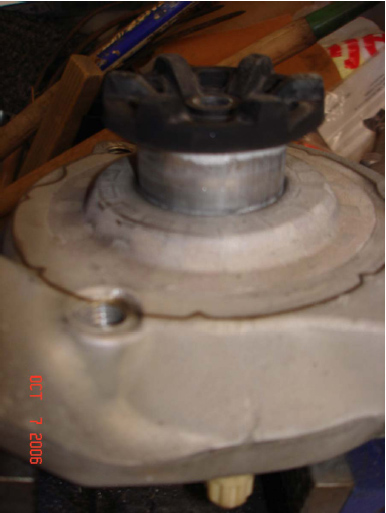
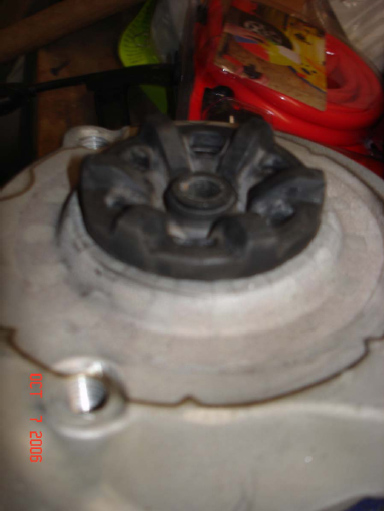
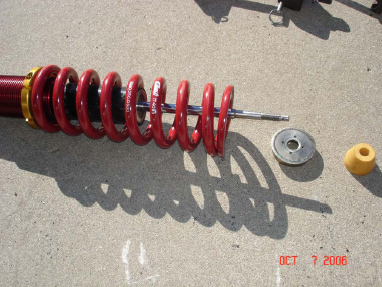
 7. Compress spring. Tip: There isn’t a lot of room around the upper control arm for the compressor. If you put the end of the compressor you turn with the wrench at the bottom of the shock module you may end up bottoming the compressor bolt against the top of the shock module before you get the spring compressed enough for disassembly. So, install the compressor with the end you turn with a wrench on top as shown in the photo.
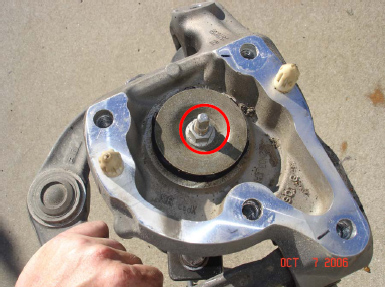
 8. With the spring compressed, remove the upper shock nut.
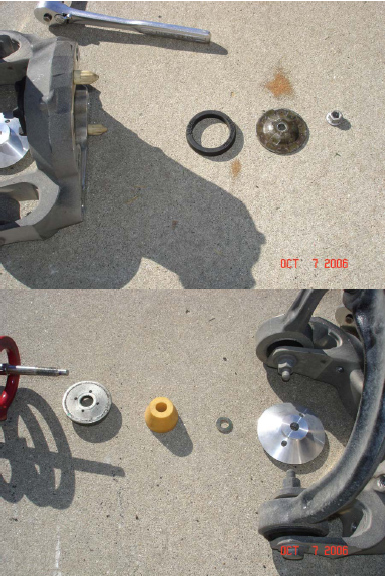
 9. Disassemble the module and remove the spring compressor.
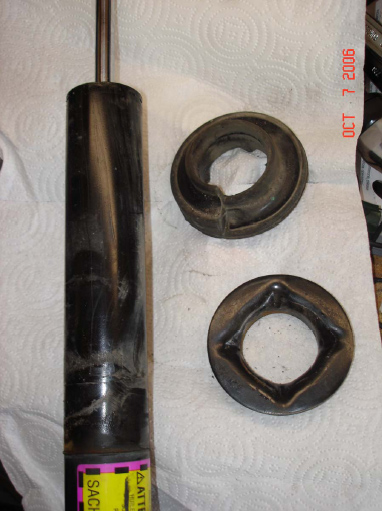
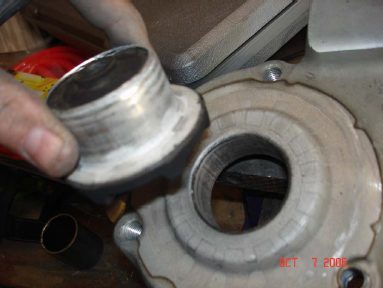
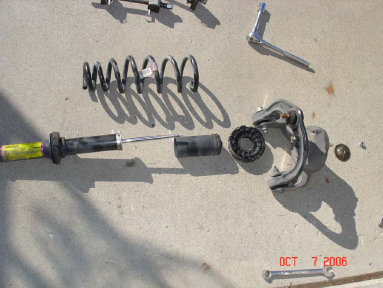 10. Continue disassembly of the shock by lightly taping the shiny cap on the top of the shock off and then pulling the lower spring isolator and perch off.
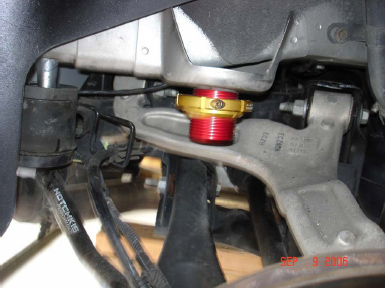
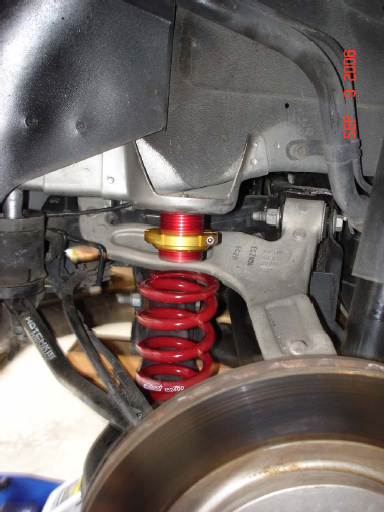
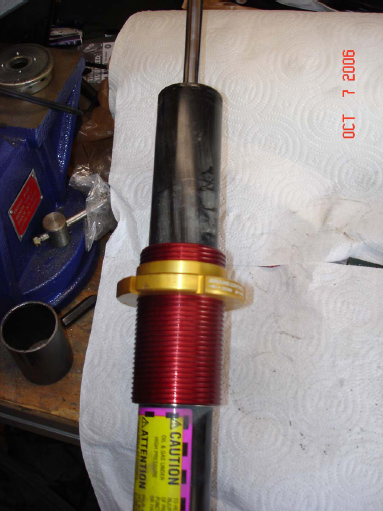
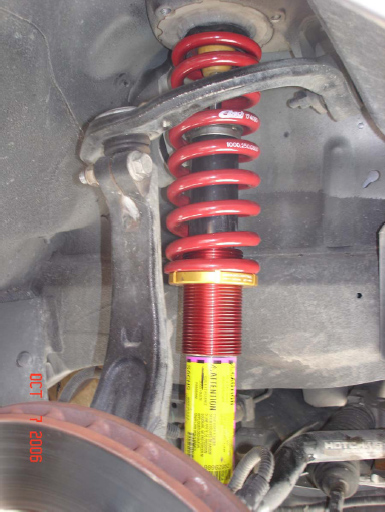
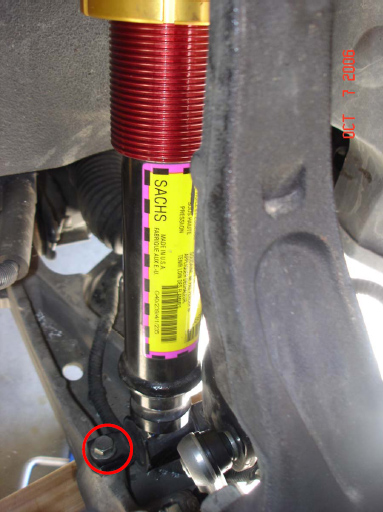
 11. Install the GC front lower mount making sure the snap ring is captured inside the bottom of the threaded sleeve. Note, the setting you see in the picture is about where I have the collar set for my car.
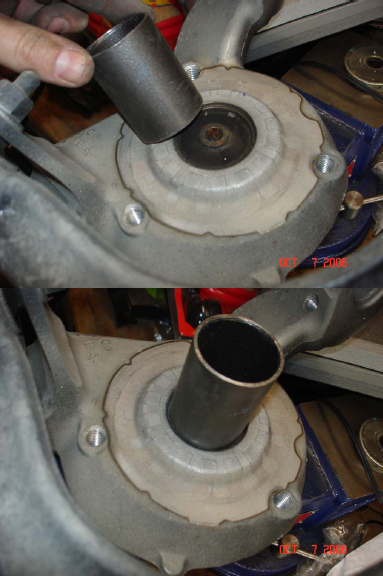
 12. Using the GC supplied arbor press out the rubber shock busing and the reinsert from the other side.
 13. Re-assemble the module per the GC sketch.
 14. After the shock module is reassembled the above procedure is basically followed in reverse to reinstall the module in the vehicle. Put the module back in the car and tighten the 5 upper mounting bolts to 112 Nm (83 lb ft). Reinstall battery and/or air conditioning line bracket if you removed them earlier.
 15. Install the 2 lower shock mounting bolts. Tighten to 25 Nm (18 lb ft). You may need to jack up the lower A-arm to get these bolts in.
 16. Jack up under the lower A-arm if you haven’t already done so and connect the upper control arm to steering knuckle. The pinch bolt and nut need to be tightened to 60 Nm (44 lb ft).
 17. Lower the jack, put the wheel back on and lower the car and you’re done!
|