How do I install a CTS Armrest?
Thanks to Ames-CTSv- http://www.blackcts-v.com/
Overview
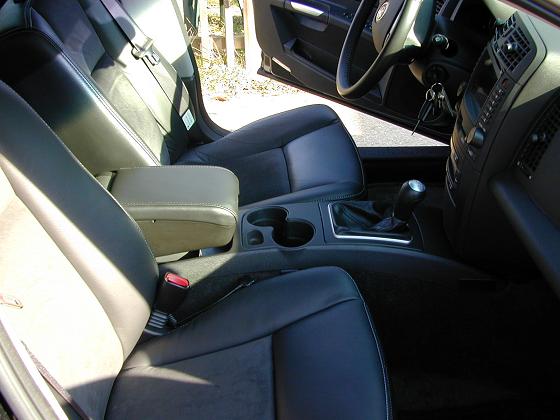
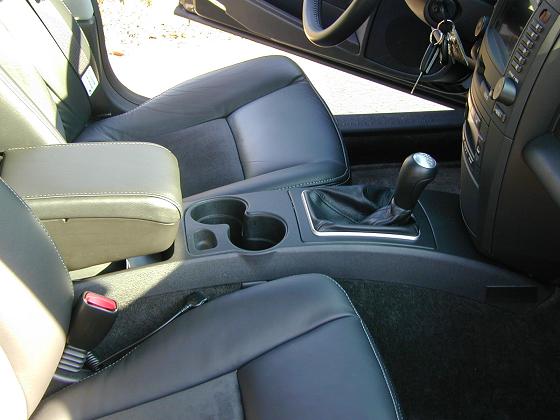
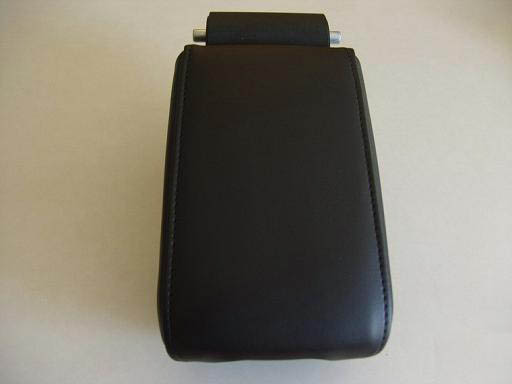
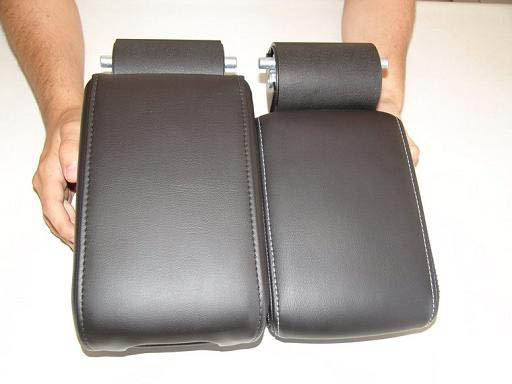
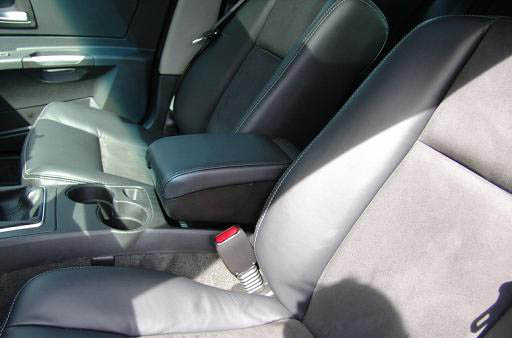
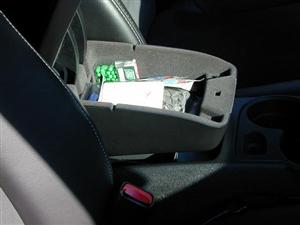
On the CTS-V Cadillac I decided to change the armrest design from the stock CTS design. Turns out the design was for the worse. The CTS-V armrest is too low and doesn't have a storage container. Here is a picture of the CTS-V with stock armrest and a couple of pictures comparing the stock armrest with the CTS armrest.

1. Items Required:
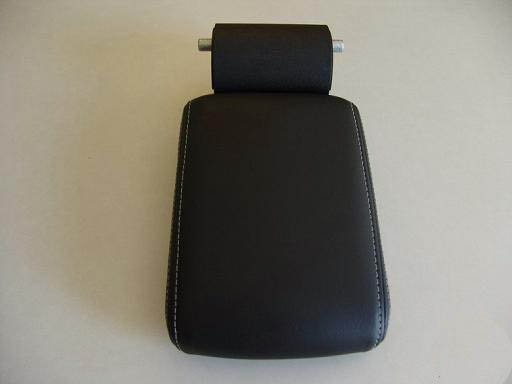
TS Armrest. You can buy this at your local dealership or from GMPartsDirect.com I bought a black console which is part number 25759213
You'll also need some basic tools, I used 2 small straight blade screwdrivers and a metric 5 allen wrench.

The Installation
1) First slide the front seats all the way forward.
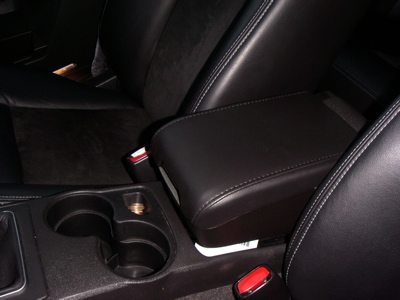
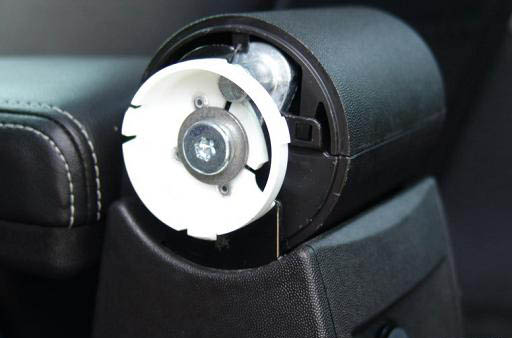
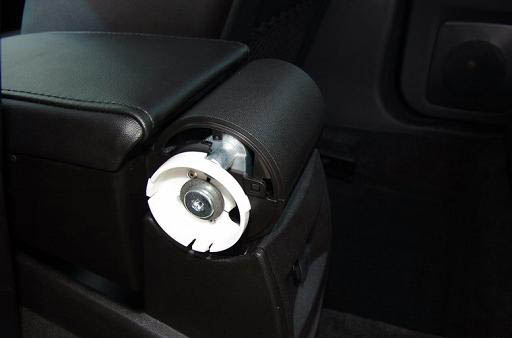
2) Remove the caps on the sides, the CTS-V service manual says you should insert a screw driver at the 6 o'clock position and push to pop the cap off. I found it was easiest to just pry the cap off with a screw driver, it's just held on with pressure fitting (white plastic below).
3) Now pop the leather cover off the armrest. It's pressure fit also so just pull it off.
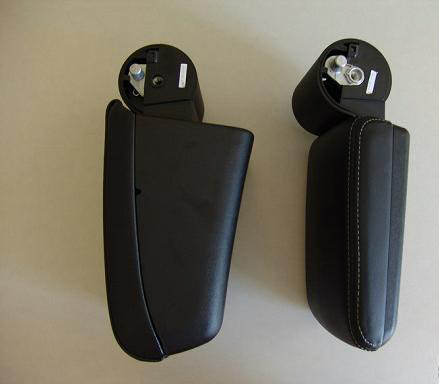
 4) Remove the 2 bolts holding the armrest in place. It looks like the bolts are really hex head, but I used a 5 Allen wrench to remove them.
 5) Now you can just pull the armrest out. Be sure not to loose the spacers. Take them off the CTS-V armrest and put them on the CTS armrest.
 6) Put the CTS armrest in the cradle and put the 2 bolts back in.
 7) Snap the covers back on and that's it.
Installed Pictures
 CTS-CTS-V FAQ: Removing the Center Armrest
How do I remove and adjust the Center armrest or replace it with a standard CTS armrest?
UPDATE
Heres a undated description of how to replace the crummy CTS-V armrest center console with the better CTS console.
You first need to pry the top half of the lid of your old console up to expose the four screws holding it in place. (Figure 1 and 2)
Then rotate the round cover off the back so you can see inside.
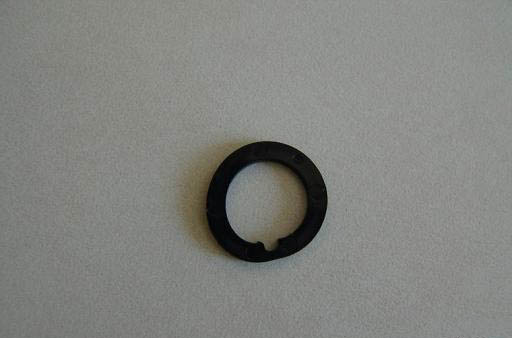
Take a thin screwdriver and pry off those difficult round side covers from the inside--just wedge the screwdriver inbetween the white ring holding them in place and pry them off. (Figure 3)
It's pretty easy from there--an Allenhead wrench to remove the old console
place the new one,
lock it in place with the allenhead
Snap the round covers back on.
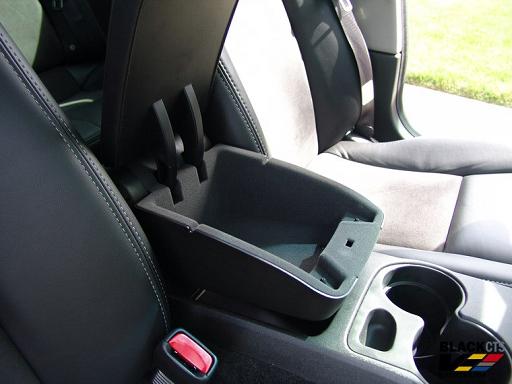
The new console adds an additional compartment in addition to the bin below it. I still don't get the design that leaves it apparently hanging, but at least this version feels a bit sturdier than the last one.
Figure 1:
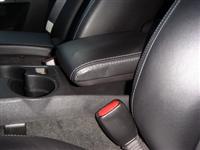 Figure 2:
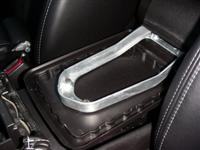
Figure 3:
 Figure 4:
Thanks DRDSGOLF
Leaning too hard on the center armrest may cause it sound like something broke inside or to pop loose causing rattling noises (loose screws or armrest) as you drive.
To remove aremrest:
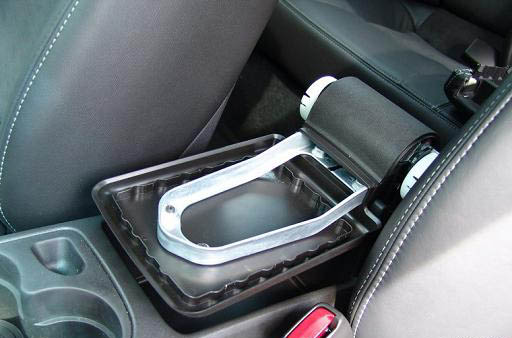
lift up on the leather top half of the armrest, it lifts straight out, and you'll see an aluminum metal bracket which has 4 screws to hold the plastic bottom of the armrest.
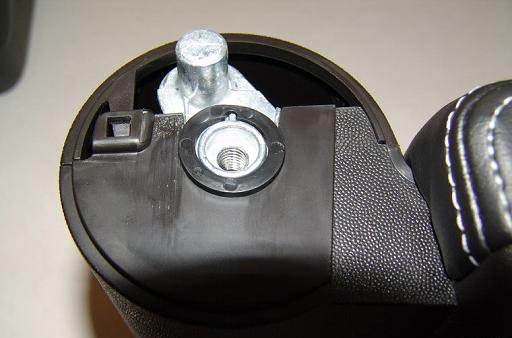
UPDATEYou don't just pop the center covers off. There's a little slot underneath at the 6 o'clock position you need to insert a small screwdriver into to depress a white retaining tab while squeezing the cover's other tabs.
Probably the two front screws have popped out of their threads if leaning too hard on it.
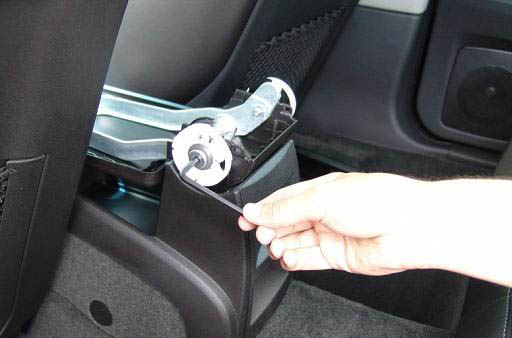
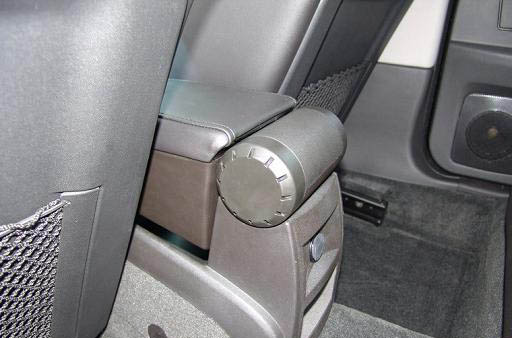
To access the rear two screws, lift up the top half of the cylindrical plastic attachment behind the armrest; it should lift straight up by squeezing the back half and lifting up.
To remove the bottom plastic half of the armrest, squeeze the back sides near the cylindrical post and the plastic bottom should slide straight out, leaving only the aluminum metal bracket.
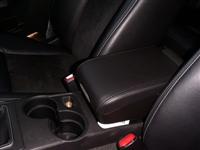
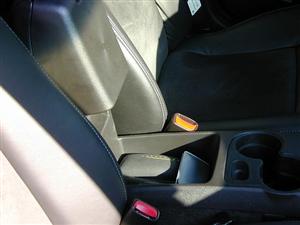
At this time you can replace the armrest with the traditional CTS armrest, which has a storage compartment built in, if you don't mind the additional height. - see images below
The two round ends of the cylinder-shaped armrest holder may be removed by prying them loose from the holder to access the hinge mechanism, but do so slowly to avoid breaking the plastic tabs that hold them to the base. They don't need to be removed to repair or remove the bottom plastic portion of the armrest.
Here are images of the CTS-V with the normal CTS- armrest


I recently ordered the CTS console from GM Parts Direct under part #25759213, which simply describes "cover" without reference to color. To my dismay, the cover I received is upholstered in black. I bracketed the part number guessing that adjoining part numbers might be for different colored covers. I confirmed from Lake Chevrolet's catalog that #25759214 is for a "pewter" cover. There is another cover under #25759212 and neither Lake Chevrolet nor GM Parts direct designate a color in their description, but this may be the neutral colored cover that you (and I) need. BTW, GM Parts Direct price for 25759212 is $99.52.
thanks stephan and Reykirkman
|


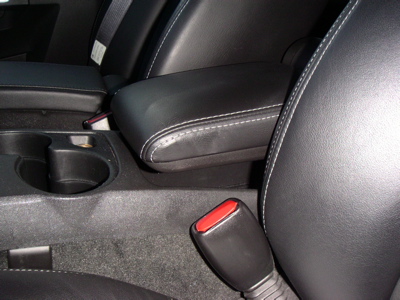 Figure 2:

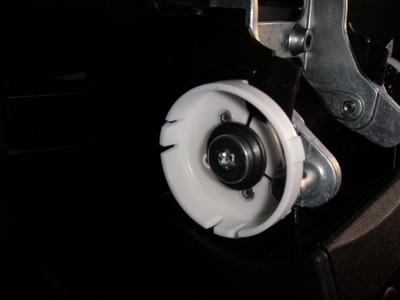 Figure 4: