
|
This information is provided as guidance Only. Use this information at your own risk! This site is not affiliated with General Motors or Cadillac. All trademarks are property of their respective owners. |
 |
|
This information is provided as guidance Only. Use this information at your own risk! This site is not affiliated with General Motors or Cadillac. All trademarks are property of their respective owners. |
|
Procedure to modify the Center Stack to support an aftermarket radioThanks to DarkWingFrogIf you intend to install an aftermarket radio and retain your DIC you need to make room for the new head unit. There is space below the DIC screen for a double din unit but you must remove the CD unit and relocate the mainboard for the radio higher to make room. How the new head unit is wired is up to you or your installer. Mine runs through my Bose system at this time. You could disconnect the speaker outputs from your current system and completely bypass them by attaching the new head unit directly to the speakers or any combination of amp/speakers. This write up is intended to get you the space for the new head unit. This is mine completed. 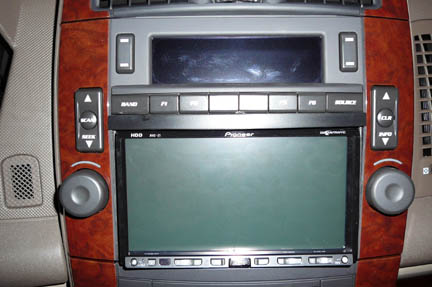
Remove the radio from the car. There are instructions for this in Reeds FAQ. Remove the mounting supports from both sides of the unit, 4 nuts. 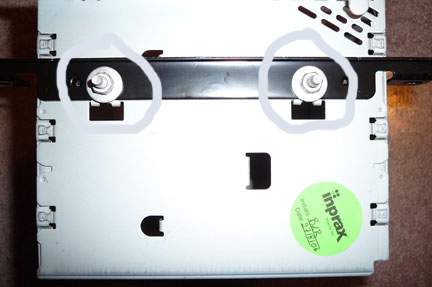
Lay the unit face down on a towel or something soft. All the screws from here on are #10 Torx. There are 2-3 on either side holding the face to the metal body, remove these. Tilt the unit upright and the face will pull off revealing 2 ribbon cables connecting the face to the main radio board inside the unit. 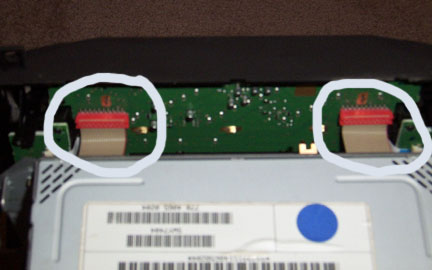
Pull the ribbons off the faceplate gently by grabbing the sides and wiggling a bit. Set the face aside. Looking at the front of the metal unit there are 6 screws, 3 on each side that hold the front metal plate to the box. Remove these and the metal plate. 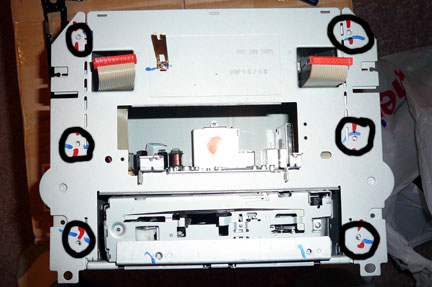 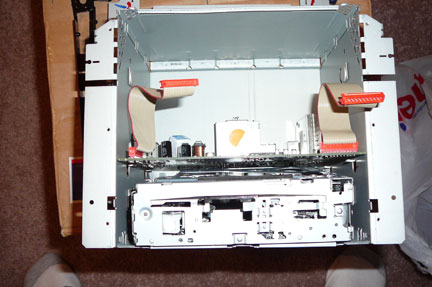
Turn the box over to see the back. Remove the screws from the back of the box. 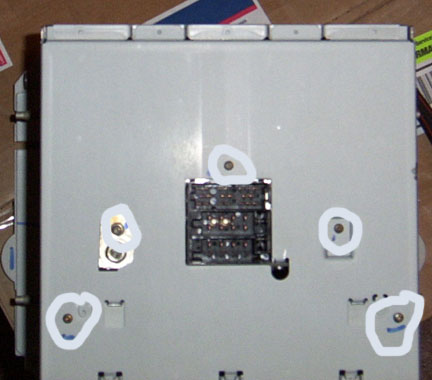
Turn the unit right side up and remove the top of the box by lifting or prying it off with a screwdriver. 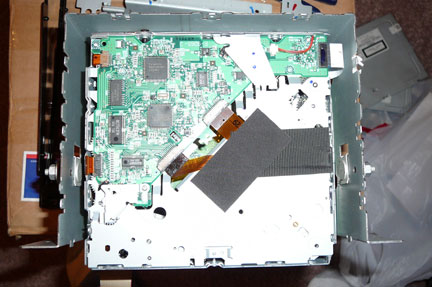
It’s held in place by pressure only. Turn the unit upside down and remove the bottom of the box the same way. The CD unit should lift out. There is a ribbon cable that attaches it to the main radio board, disconnect it from the board or CD unit. Set the CD unit aside. 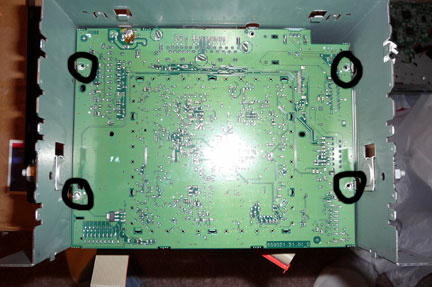
You are now looking at the underside of the main radio board. There are 2 screws on either side to remove. The antenna is soldered to the board and through the back of the box. Heat a soldering iron and while holding the outer part of the antenna connector, heat the solder holding it to the board. Pull gently while doing this and when the solder heats enough the connector will pull out. 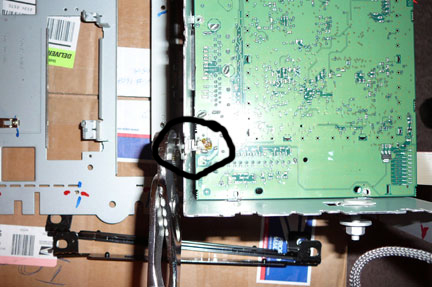
Set it aside. It’s up to you if your reconnect it later or not but you don’t need it if you’re installing a new head unit that is going to handle fm tuning for you. I didn’t waste time reconnecting it. The main radio board is now only held by one last screw on the side that connects the radio to a heat sink. Remove it and take the main board out and set aside. Congratulations, you now have an empty shell for a radio! The main radio board is going to be in the way if left where we took it from. It needs to be moved up in the shell to sit behind the DIC screen. Slide it into the box as high as it will go, the screw connector above the plugs should be at the top edge of the box. 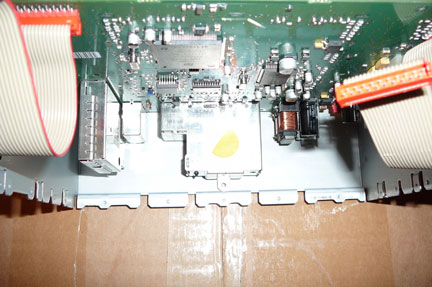
Go under the board and when you have the main board laying pretty straight and even mark around the bottom edge, back and sides. Remove the main board and set aside. 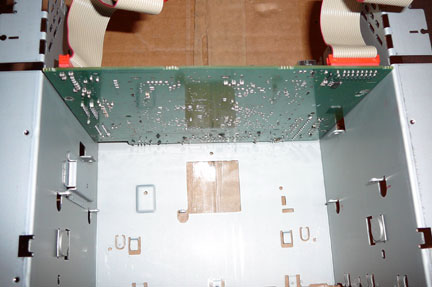 
The line you drew will tell you where the board is going to sit. Measure the distance from the back of the unit to each of the four old screw mounting points and transfer the measurements to your line. I used a straight edge and transferred the outline of the original hole for the plugs to my new line location. 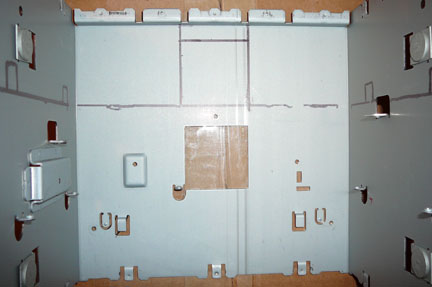
I used a Dremel tool and cut out the box for the plugs and 3 sides each of the four tabs. Cut the vertical and top sides, not the edge on the line you drew around the main board. After the 3 sides are cut you can bend the tab into the box to make a new support for the main board. I actually laid the main board on top of these new supports rather than trying to screw them on from below like originally. You can mark the screw holes with the board in place and drill them the make it secure. Also mark and drill a hole for the screw above the plugs. I removed heat sink by prying it off with a screwdriver. I bent the edges out a little and was able to put it back on later by drilling a hole to get to the screw from outside the box. Go ahead and cut the back of the box off from the top of the old plug opening down. 
This needs to be out of the way for the new head unit installation. Mount the main board in it’s new location, secure with screws and replace the heat sink. Put the top and bottom of the box back in place. Take the metal faceplate you removed earlier and cut an opening as marked in the pictures. 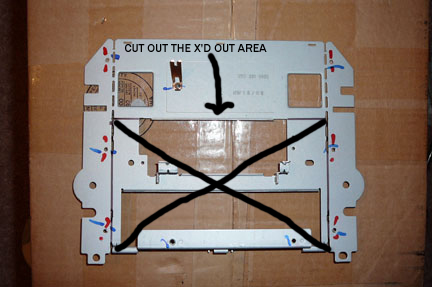
You can use a dremel but I found tin snips worked for me. Re secure this piece to the box and set the whole thing aside. Remove the knobs from the faceplate by pulling on them then turn the faceplate over onto something soft. There are 3 circuit boards back here, the main one that holds the DIC screen and one on either side that control the knobs and buttons there. I removed everything but you may get away with just removing the large circuit board that holds the DIC screen. 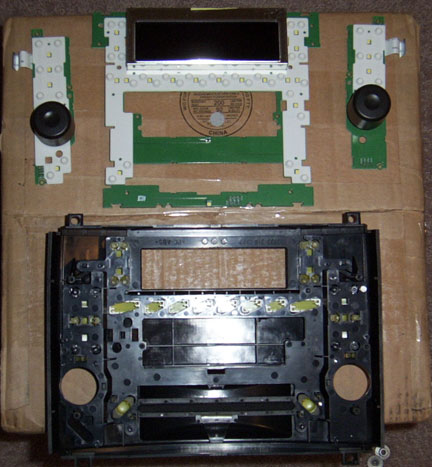
There are several screws holding each of these in place and ribbon connectors that attach the 2 side boards to the main DIC board. The ribbon connectors come off the DIC board by gently lifting on the sides of connector, it will come up slightly but not off, this releases the ribbon to be pulled out. You only need to remove the DIC board but you may have to remove more to get to it. Once it is out you can cut off the lower part of the board that used to control the CD unit. Use the Dremel and cut it straight across about a 1/8th inch below each of the ribbon connectors. 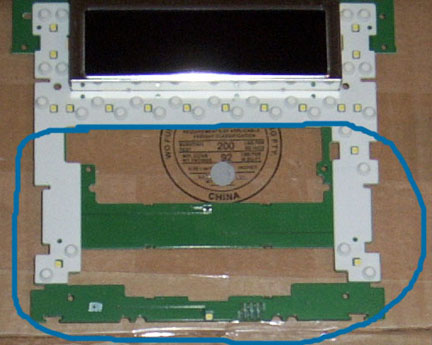
The above picture shows the front of the board; turn it over to cut so you can be below the ribbon connectors. Trim the white rubber button mat too. If you are taking this to your local stereo shop to finish the install you are done and can put everything back together in reverse order. The back hasn’t been cut out yet in this photo. 
Once the ribbon cables are back in place be sure to slide the connectors back down to lock them in place. This applies only to the ribbons on the DIC board; the others just push in place. Once installed back in your dash the DIC will function normally and you will still be able to get XM for the time being, unless you didn’t have XM before you started this project. If you are trying to install the head unit yourself, good luck. That part is beyond my knowledge. But you will want to go ahead and cut away the plastic pieces behind the faceplate that are going to be in the way of the new head unit. If you cut the faceplate yourself I suggest planning to mount the new head unit in the lowest position. Remove the faceplate following the lines up either side of the face and stop a couple inches below the F buttons before cutting across. You can trim up later to fit the new head unit in the hole but you can’t put plastic back. My installer was Autosound in Lexington KY. They wired everything to still run through my bose amp and speakers. I actually still use the original volume knobs on the radio and steering wheel to control the unit. I can still make adjustments to the sound with the Bose amp by changing EQ and DSP settings just like before the install. Of course, Onstar and all the original chimes and bells work. If your installer needs help they might try contacting Jeff Langley at Autosound, 866-278-3043. Tell them Mark Sparks sent you. :) thanks DarkWingFrog |